How to Use SSH Login to Connect to a Remote Server?
Secure Shell (SSH) is a protocol used to securely access and manage remote systems. It encrypts the communication between your computer (the client) and the remote server, protecting your data from eavesdropping and unauthorized access, thus enhancing security.
SSH allows developers, system administrators, and IT professionals to remotely access and manage computers from anywhere. This improves productivity and simplifies system management. It’s user-friendly and supported by numerous tools and clients. Beyond basic remote access, SSH enables secure file transfers, remote command execution, and secure tunneling of other network connections.
This guide provides a step-by-step walkthrough on how to use the `ssh` command to connect to remote servers using SSH on Windows, Linux, and macOS.
How SSH Works? (How to SSH into Server)
SSH works by creating a secure, encrypted connection between your computer (SSH client) and a server running an SSH daemon (sshd).
As mentioned earlier, the `ssh` command acts as the client, while the remote machine runs the SSH server (sshd).
Most Linux distributions automatically start the SSH server upon boot. However, if SSH isn’t running on the server, you’ll need to directly access the server (either through a web-based console or a local connection) to manually start the SSH daemon.
Starting the SSH Server on Ubuntu
If the SSH server is not running, use this command to start it:
$ sudo systemctl start ssh
Once the server is active, you can connect to it remotely via SSH.
You can check if the SSH service is running with:
$ sudo systemctl status ssh
How to Use SSH in Windows?
Windows 10 and later include a built-in SSH client, making the setup process straightforward.
Enabling SSH on Windows 10
- Go to Settings, then Apps > Optional Features.
- See if “OpenSSH Client” is listed. If it’s not, click “Add a feature”, search for “OpenSSH Client”, and install it.
Connecting to a Remote Server
After enabling SSH, use PowerShell or Command Prompt to connect to the remote server:
ssh username@server_ip
Replace `username` with your username on the remote server, and `server_ip` with the server’s IP address.
Using PuTTY for Older Windows Versions
If you have Windows 8 or an older version lacking a built-in SSH client, use PuTTY. It’s a free SSH client with a graphical user interface:
- Download and install PuTTY from the official PuTTY website.
- Launch PuTTY and enter the server’s IP address in the “Host Name (or IP address)” field.
- Ensure the port is set to 22 (the default SSH port).
- Click “Open” to initiate the connection.
PuTTY is a user-friendly alternative if you prefer a graphical interface over command-line tools.
How to Use SSH Login in Linux?
Most Linux distributions have SSH client pre-installed. To check if SSH is available, open your terminal and execute:
$ ssh
Installing SSH on Linux
If SSH is not installed, use your distribution’s package manager to install the `openssh-client` package. For Debian-based systems like Ubuntu, use the following command:
$sudo apt-get install openssh-client
Connecting to a Remote Server
Once SSH is installed, securely connect to a remote server with:
$ssh username@server_ip
Replace `username` with your username on the remote server and `server_ip` with the remote server’s IP address.
How to Use SSH on Mac?
Here’s how to establish an SSH connection on macOS:
Launch Terminal: Click the Terminal icon in your Dock or find it in `/Applications/Utilities`.
Start an SSH Connection: Use the following SSH command format:ssh username@hostname
For instance, to connect as the user “test” to a server named “Centos.local,” the command would be:ssh test@Centos.local
Confirm Connection (First Time Only): If connecting to the server for the first time, you’ll see a message asking if you trust the host. Type `yes` to verify the connection.
Enter Your Password: When prompted, enter your password for the remote user account.
Exit the SSH Session: To end the session, press CTRL+D or type:exit
Closing the session prevents accidental commands and enhances security.
Common SSH Commands and Features
After connecting to a remote server via SSH, you can accomplish various tasks: tunneling, file transfers, and remote command execution.
1. Secure Port Forwarding with SSH
SSH tunneling securely routes traffic between your local machine and the remote server. For local port forwarding, use:
ssh -L 8080:localhost:3306 user@192.168.1.110
This example forwards port 8080 on your local computer to port 3306 on the remote server at IP address 192.168.1.110. This is often used to securely access databases running on the remote server.
2. Secure File Transfer and Management
SSH enables encrypted file transfers with SCP (Secure Copy) and SFTP (SSH File Transfer Protocol).
- Transferring a file from your local machine to the remote server using SCP:
scp report.pdf user@192.168.1.110:/home/user/documents/
This command securely copies `report.pdf` from your local computer to the `/home/user/documents/` directory on the remote server.
- Using SFTP to manage remote files:
sftp user@192.168.1.110
After connecting with SFTP, you can navigate the remote file system to upload and download files interactively.
3. Simplify SSH Remote Access with a Config File
To simplify SSH connections, create an SSH configuration file (`~/.ssh/config`) to store frequently used connection settings.
Example `~/.ssh/config` file:
Host devserver
HostName 192.168.1.110
User user
Port 2222
With this configuration, you can connect to the server using only:
$ ssh devserver
4. Running Commands on a Remote Server
To execute a single command on the remote server without opening an interactive shell, use:
$ ssh user@192.168.1.110 "df -h"
This command retrieves disk usage information (`df -h`) from the remote server and displays it locally.
How to Login into SSH Using Keys?
While password authentication allows access to remote systems, using SSH keys is a more secure and convenient method.
How Does Key-Based Authentication Work?
SSH key authentication relies on a pair of cryptographic keys:
- Private Key: This is kept secret and secure on your computer (the client). Never share your private key!
- Public Key: This key can be freely shared and added to the `authorized_keys` file on any server you want to access.
When you attempt to connect to the server, the server uses the public key to send an encrypted challenge to your computer. Your private key decrypts this challenge and sends back a response, verifying your identity. This process is automatic once SSH keys are properly configured.
Generating SSH Keys
To set up SSH key authentication, generate a key pair on your local machine using the following command:
$ ssh-keygen -t rsa
You’ll be prompted to enter a passphrase to protect the private key. Setting a passphrase is optional but recommended for enhanced security. If you don’t want a passphrase, just press Enter twice. The keys will be saved by default in the `~/.ssh/` directory with these filenames:
Public key: ~/.ssh/id_rsa.pub
Private key: ~/.ssh/id_rsa
Verifying SSH Key Files
Navigate to the `.ssh` directory:
cd ~/.ssh
Check the permissions and contents of the generated keys using:
ls -l
This command displays details about the files, confirming that they were created correctly.
How to Disable Password Authentication for SSH?
After setting up SSH key authentication, you can improve security even further by disabling password-based login. This ensures that only users possessing the correct private key can access the server.
Important Note: Before proceeding, make sure your public key is correctly installed on the remote server. If you lock yourself out, you will need console access to restore SSH functionality.
Change SSH Configuration to Disable Password Login
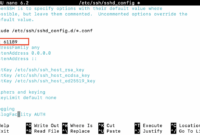
Open the SSH configuration file with root or sudo privileges. Use your preferred text editor (e.g., nano, vim):
$ sudo nano /etc/ssh/sshd_config
1. Find the line that starts with `PasswordAuthentication`, remove the `#` at the beginning (if present), and change its value to `no`:
PasswordAuthentication no
2. Ensure that public key authentication is enabled and challenge-response authentication is disabled. These settings should be present in the file:PubkeyAuthentication yes
ChallengeResponseAuthentication no
Save and close the file.
Apply the new configuration by restarting the SSH service:
$ sudo systemctl reload ssh
With this configuration, password authentication is disabled, and access is only possible via SSH key authentication, making your server more secure.
Best Practices to Improve Security for SSH Connections
Enhance your SSH connection security by implementing these best practices:
1. Use SSH Keys or Strong Passwords: SSH keys offer superior security compared to passwords. If using a password, create a strong, unique password with a mix of uppercase and lowercase letters, numbers, and symbols.
2. Disable Root Login: Prevent unauthorized direct root login by disabling it in the SSH configuration file (`/etc/ssh/sshd_config`). Set:
PermitRootLogin no
3. Change the Default SSH Port: Change the default port (22) to a non-standard port (above 1024) to reduce the risk of automated attacks. Modify the “Port 22” line in `/etc/ssh/sshd_config` and restart SSH for the changes to take effect. Remember to update your firewall rules to allow connections to the new port.
4. Use Security Tools: Install tools like Fail2Ban to automatically detect and block repeated failed login attempts, preventing brute-force attacks:$ sudo apt-get install fail2ban
Implementing these practices will significantly strengthen your SSH security and protect against unauthorized access.
Conclusion
Understanding SSH is essential for anyone working with remote servers or cloud computing. This guide showed you how to connect to a remote server using SSH. As you become more familiar with SSH, you’ll discover advanced features that simplify your workflows. Its robust security, efficiency, and flexibility make SSH a valuable and widely-used tool in various applications.
Deploy your KVM VPS instantly across 20 global locations with BlueVPS! Enjoy seamless remote access, full control, and 100% dedicated resources with KVM virtualization. Choose from Linux or Windows-based VPS with all major control panels, backed by 24/7 expert support. Get started now for a powerful and reliable hosting experience!
Blog

