cPanel & WHM’s intuitive web interfaces simplify server and web hosting account management. However, command-line access is sometimes necessary. The PuTTY SSH (Secure Shell) client allows secure, encrypted logins to a server’s command-line interface, protecting sensitive data.
Once logged in, you gain access to a full suite of Linux command-line tools, cPanel & WHM API utilities, and scripting capabilities for automating administrative tasks. This article guides you through logging in via SSH with PuTTY, covering both username/password authentication and the more secure SSH key method.
What is the PuTTY SSH Client?
The PuTTY SSH client is a set of GUI tools for managing SSH sessions. It includes an SSH session manager and a terminal emulator, along with helper tools like an SSH key generator, which we’ll explore later.
PuTTY is cross-platform but is commonly used on Microsoft Windows® because, traditionally, Windows lacked a built-in SSH client.
Accessing cPanel Servers via SSH with PuTTY
To follow this guide, you’ll need PuTTY installed on your local computer, access to a server or hosting account that permits SSH connections, and your cPanel account username and password.
Logging in with a username and password is a simple process. After installing PuTTY, launch it from the Start menu.

While the interface may seem complex, focus on the Hostname and Port fields. Enter your server’s domain name or IP address in the Hostname field. You can find the IP address in the General Information section of the cPanel sidebar.
Unless your hosting provider has customized the SSH port, leave the Port entry set to the default value of 22.
Click Open at the bottom of the window. PuTTY will attempt to initiate an encrypted SSH session on your server. If this is your first connection, Windows may prompt you for permission. Proceed if you entered the host details accurately.
Upon establishing a connection, PuTTY’s terminal emulator will display a username prompt. Enter your cPanel username, press Enter, and then enter your password.
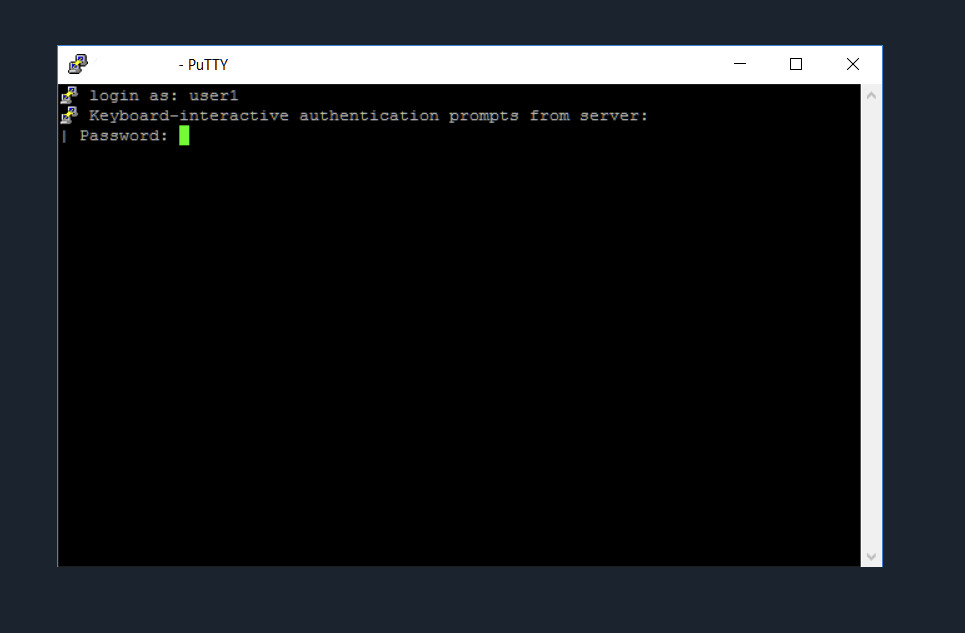
If successful, the server will authenticate you and provide a command prompt. For basic access to cPanel via PuTTY, logging in with a username and password is sufficient.
Continue reading to learn a more secure authentication method.
How To Connect to Your cPanel Server With PuTTY SSH and SSH Keys
SSH keys offer an authentication mechanism based on public-key cryptography. Users generate a key pair consisting of a public key and a private key. The private key is kept secret, while the public key is uploaded to the server. The keys are cryptographically linked, allowing the SSH server to verify private key ownership using the public key.
This approach provides several advantages. SSH keys are resistant to brute-force and dictionary attacks. As long as the private key remains secure, guessing it is impossible. SSH keys can also be protected with a passphrase, enhancing security. Unlike passwords, the private key is never transmitted over the internet, preventing interception.
SSH keys aren’t flawless: a compromised machine storing the private key could lead to theft. However, they offer significantly stronger security than typical passwords.
Generating SSH Keys with PuTTY
Installing PuTTY also installs the PuTTY Key Generator. Launch it from the Windows menu. The interface might appear complex, but we’ll focus on key elements.
To enhance security, use a passphrase for your keys by entering it in the Key passphrase and Confirm passphrase fields.
Click the Generate button. PuTTY will prompt you to move the mouse, as this random movement generates data needed for key creation. Afterward, the public key appears in the top text field.
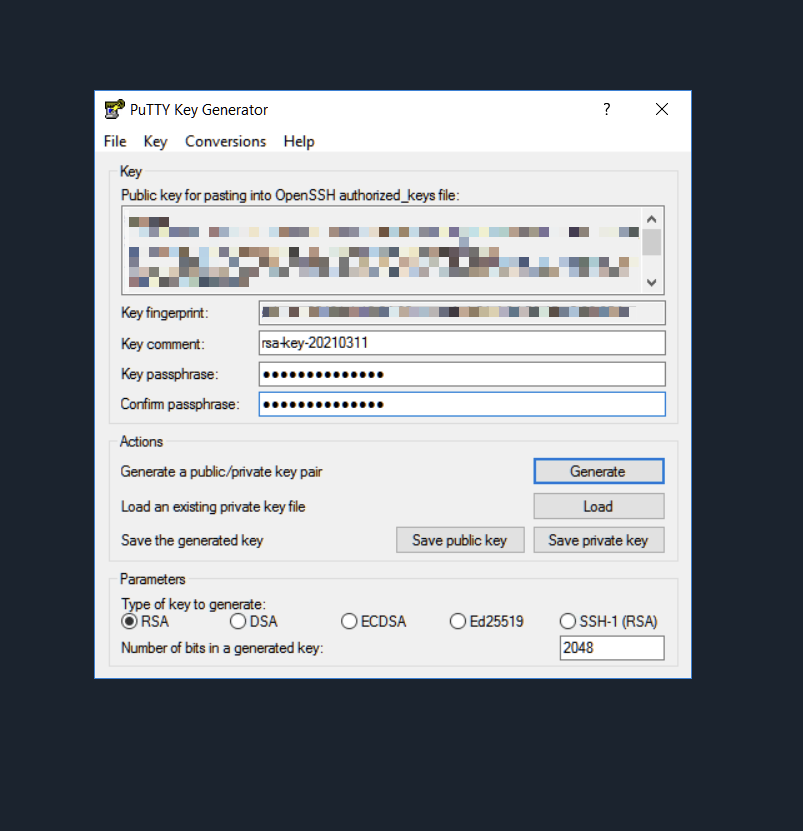
Before addressing the public key, click the Save Private Key button to save the .ppk file with a descriptive name.
Uploading the Public Key to Your Server
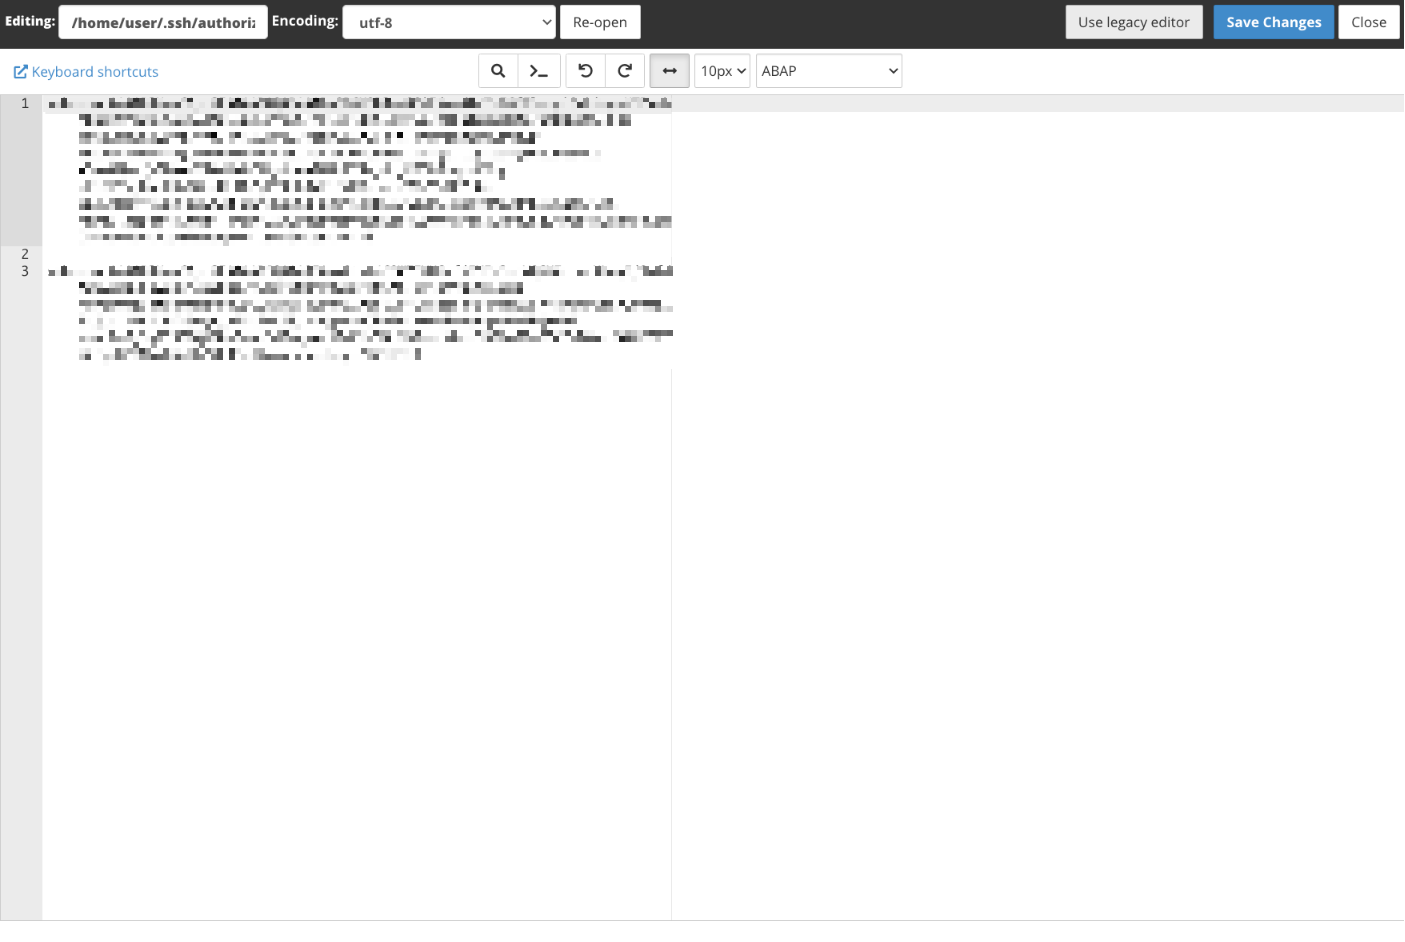
The public key needs to be accessible to the SSH server. We’ll accomplish this by adding it to your user account’s authorized_keys file.
Log in to your cPanel account and open the File Manager, located in the Files section of the main page menu. Navigate to the .ssh folder, select the authorized_keys file, and click the Edit button in the toolbar.
Copy the public key from the PuTTY Key Generator and paste it at the end of the authorized_keys file, adding an empty line between your existing keys and the new key. Click the Save Changes button.
With both keys in place, you can now use them to authenticate. First, you’ll need to tell PuTTY the location of your private key.
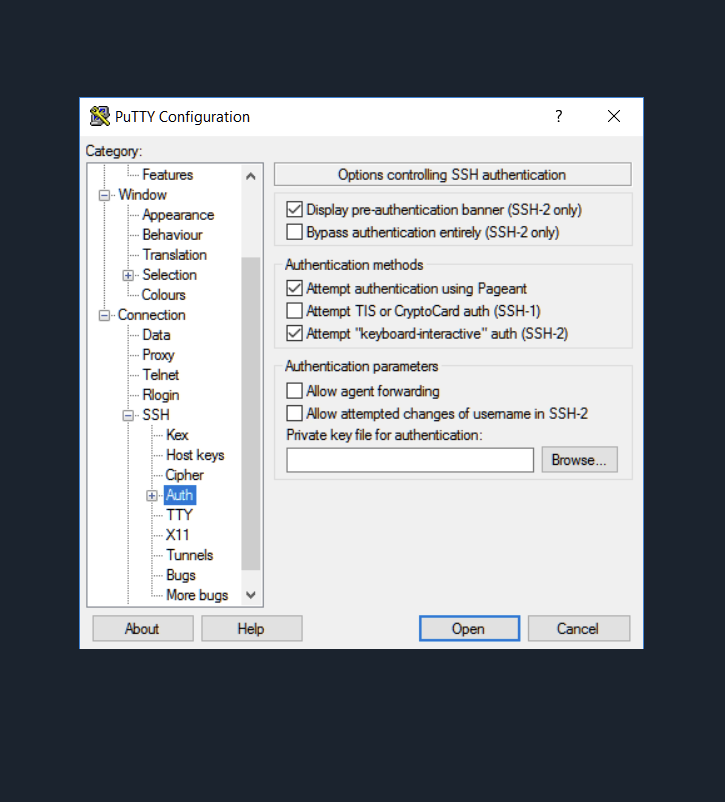
Open PuTTY’s main session interface:
- Enter your server’s domain name or IP address.
- In the left-hand sidebar, expand the Connection item, then the SSH item, and click Auth.
- Click the Browse button and select the .ppk file you saved previously.
- Click the Open button at the bottom of the window.
PuTTY will now attempt to authenticate with the server using the private key. It will open the terminal emulator and ask for your username and the passphrase associated with the key (if applicable). Providing the correct credentials will grant access to the server’s command line.
Finally, you can save these session details in the main interface to avoid re-entering the private key and domain name each time you log in.
PuTTY SSH emerged as a valuable tool when Windows lacked a built-in SSH client. While still powerful and feature-rich, Windows 10 offers a native SSH client. If you don’t require PuTTY’s extensive features, exploring the built-in client might be worthwhile.
We welcome your feedback and comments. Please reach out through Discord, the cPanel forums, and Reddit. Also, follow us on Facebook, Instagram, and Twitter.


