A web server managed by cPanel & WHM juggles many tasks, but its primary role is serving web pages based on HTTP requests. This process hinges on properly configured domain names and IP addresses. While manually configuring these elements can be complex, cPanel & WHM’s user-friendly web interface simplifies everyday web server administration.
In this article, we’ll cover four key areas of IP and domain name management:
- Adding a new IP address and associating it with a domain.
- Adding a new domain within cPanel.
- Configuring domain redirects using cPanel.
- Setting up domain forwarding within WHM.
Finally, we’ll discuss how to clear operating system DNS caches, a crucial step for resolving issues that often arise after changing IP and domain configurations.
How to Redirect a New IP to a Domain in cPanel
Adding a new IP address to your server can serve several purposes, such as providing a cPanel user or reseller with a static IP or enabling a site to function using a dedicated address.
To add an IP address to a web server, you’ll need:
- Access to the server’s root account (we’ll be using WHM).
- A new IP address obtained from your hosting provider. They will handle the network configuration to link the IP to your server.
Our first step is to inform cPanel & WHM about the new IP address. This allows the platform to configure the server accordingly and make the IP available for use with websites and other services.
In WHM’s sidebar menu, under IP Functions, navigate to Add a New IP Address.
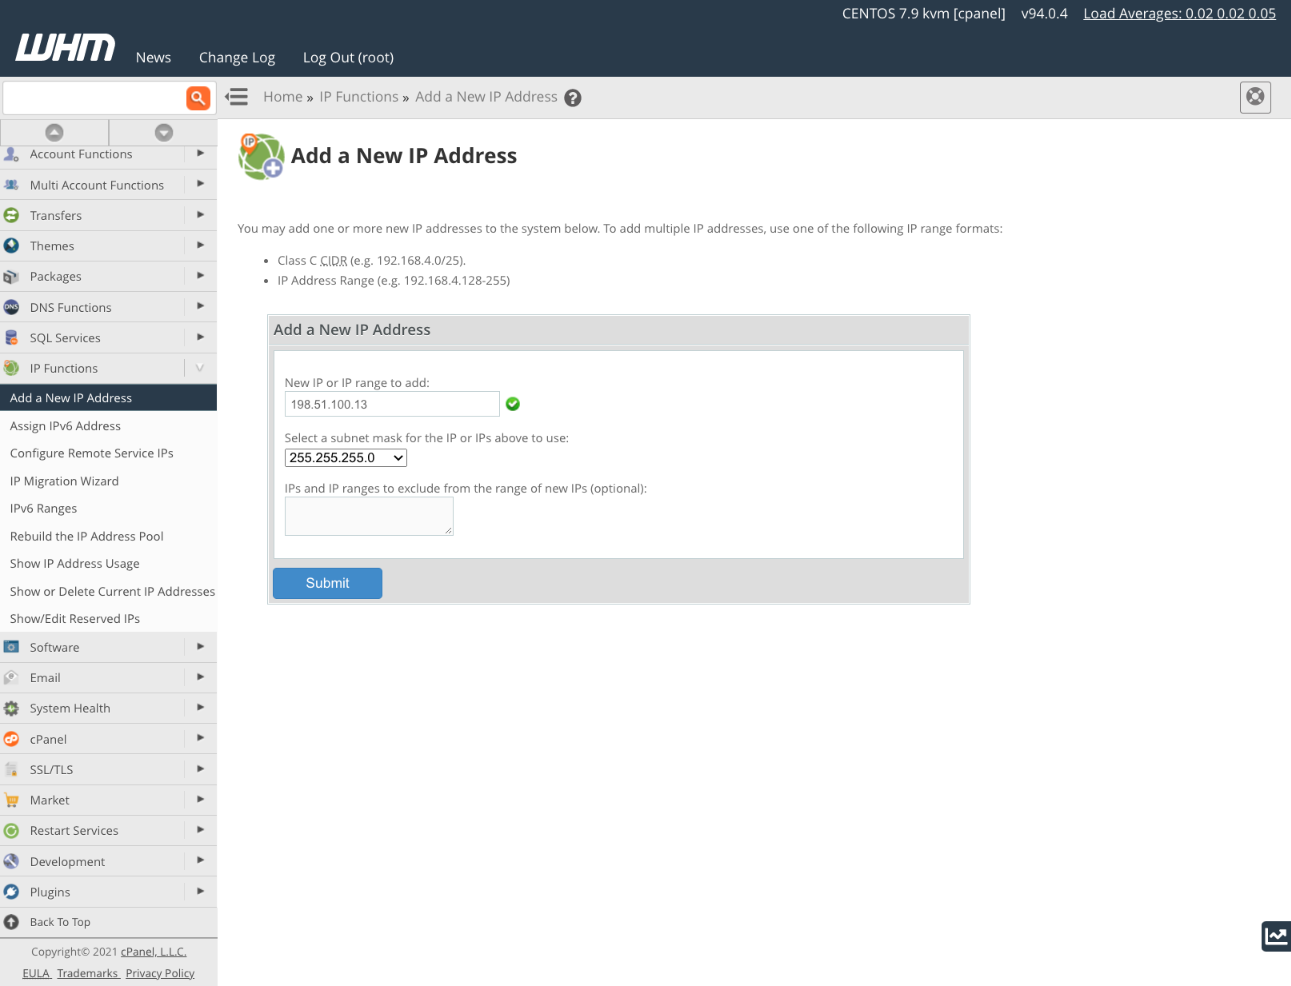
Enter the new IP address and the corresponding subnet mask. If unsure about the appropriate subnet mask, consult your hosting provider. The subnet mask defines which portion of the address designates the network and which designates devices on that network. While it may differ based on your host’s configuration, all IPs on your server should use the same subnet mask.
Click Submit to complete the process. If errors occur, you can use Show or Delete Current IP Addresses to remove the new addres.
Now that the address has been added, you can associate it with hosting and reseller accounts or individual websites. We’ll demonstrate changing an existing site’s IP address to the newly added one.
Open the List Accounts page in the Account Information submenu. Select the account linked to the domain you wish to modify, and click the “+” icon next to the domain.
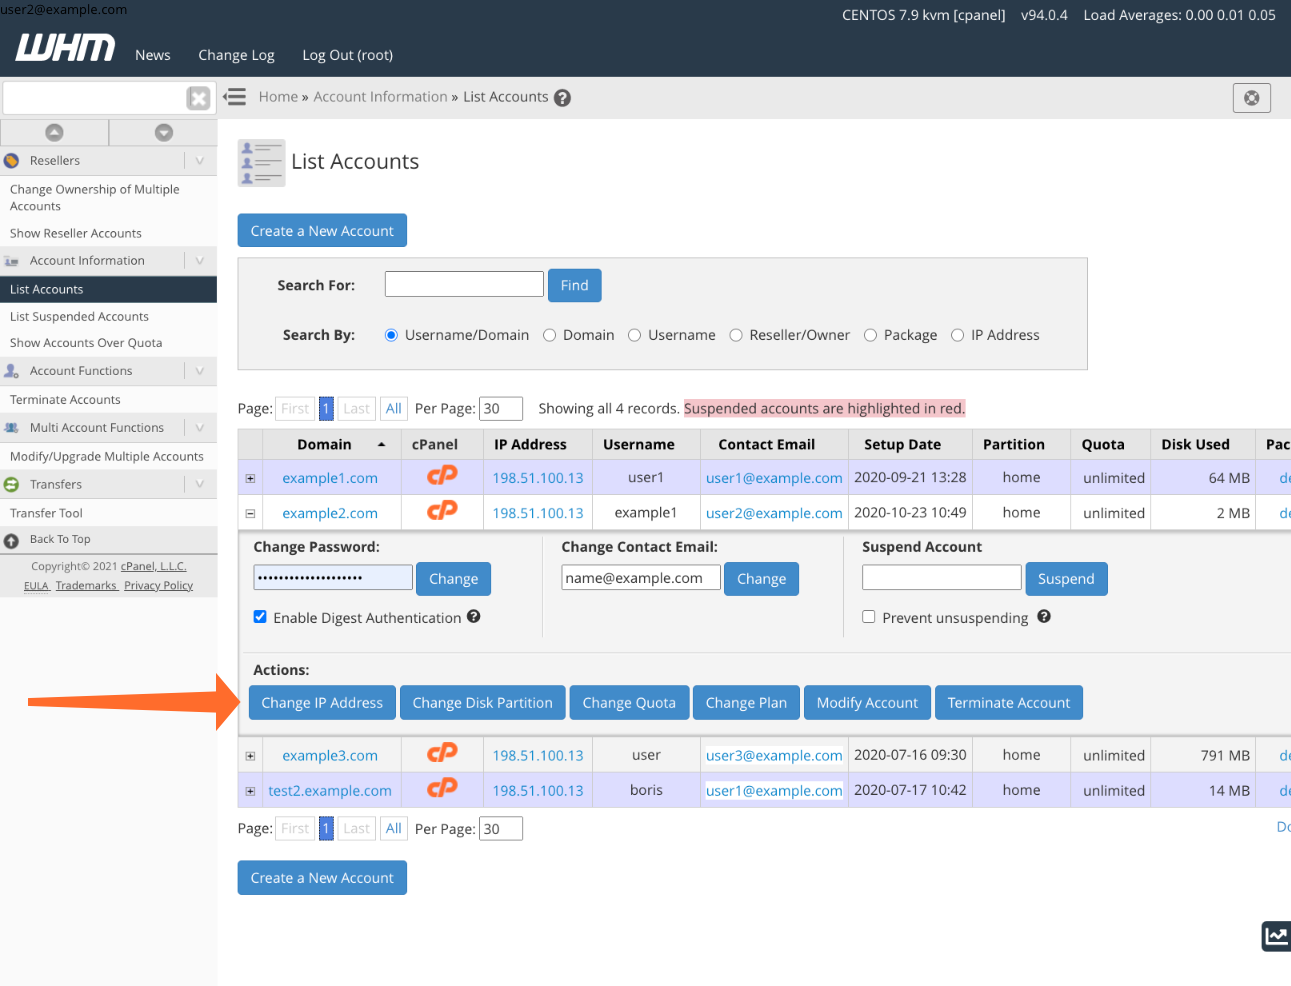
Click the Change IP Address button, then select the IP address you previously added from the dropdown menu.
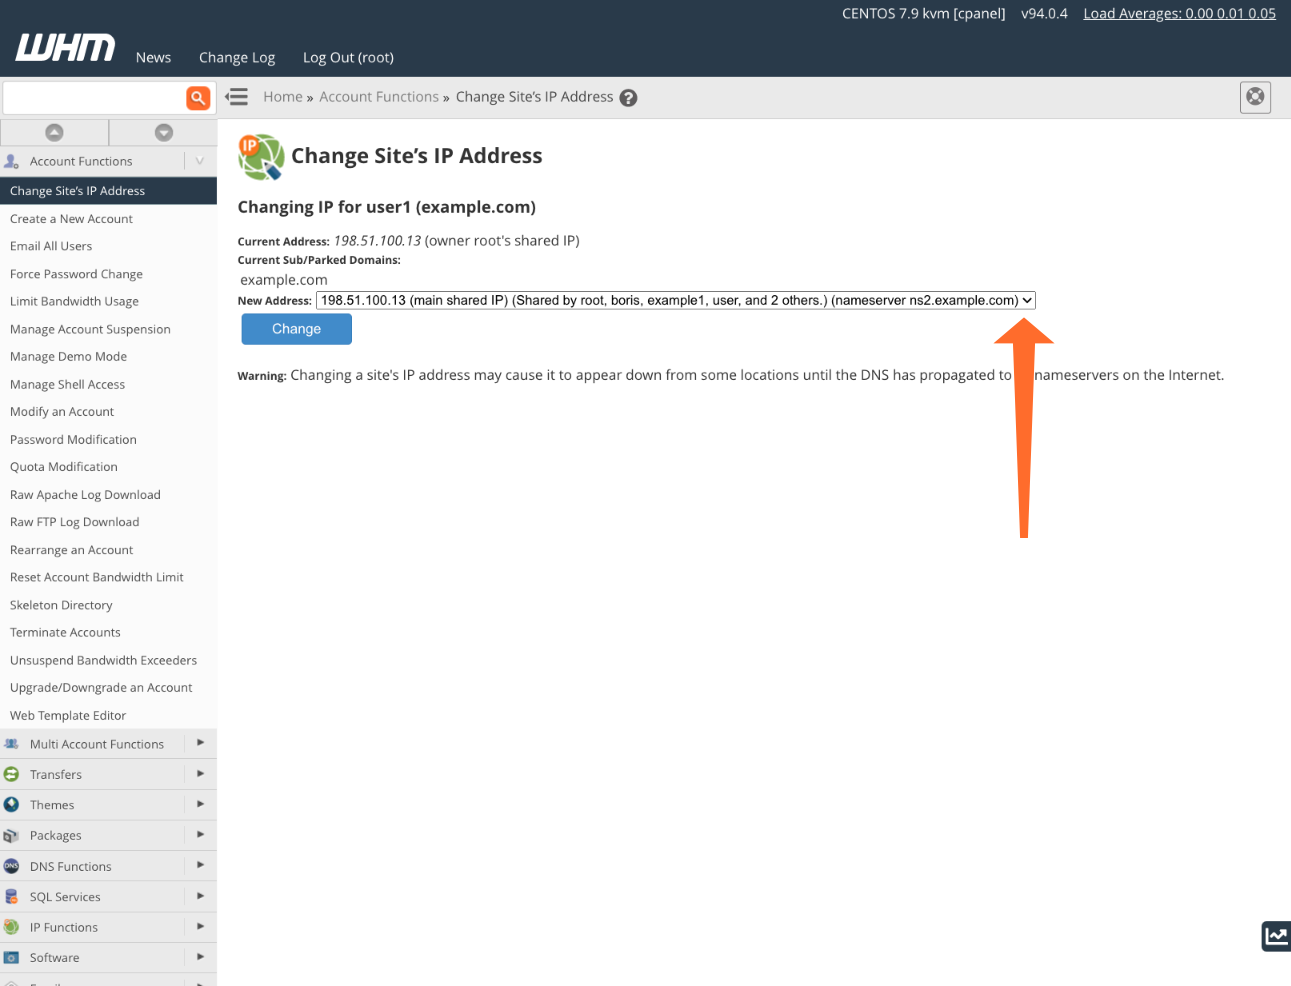
Altering the site’s IP address will make it inaccessible at its previous IP, potentially causing temporary downtime.
How to Add a New Domain to cPanel
Adding a new domain is a routine task. Here’s how to accomplish it in less than a minute using cPanel. This assumes you’ve already registered your domain and your account’s DNS servers are properly configured. For more information on DNS server configuration, refer to How to Configure DNS Nameservers with cPanel and The DNS Zone For Beginners.
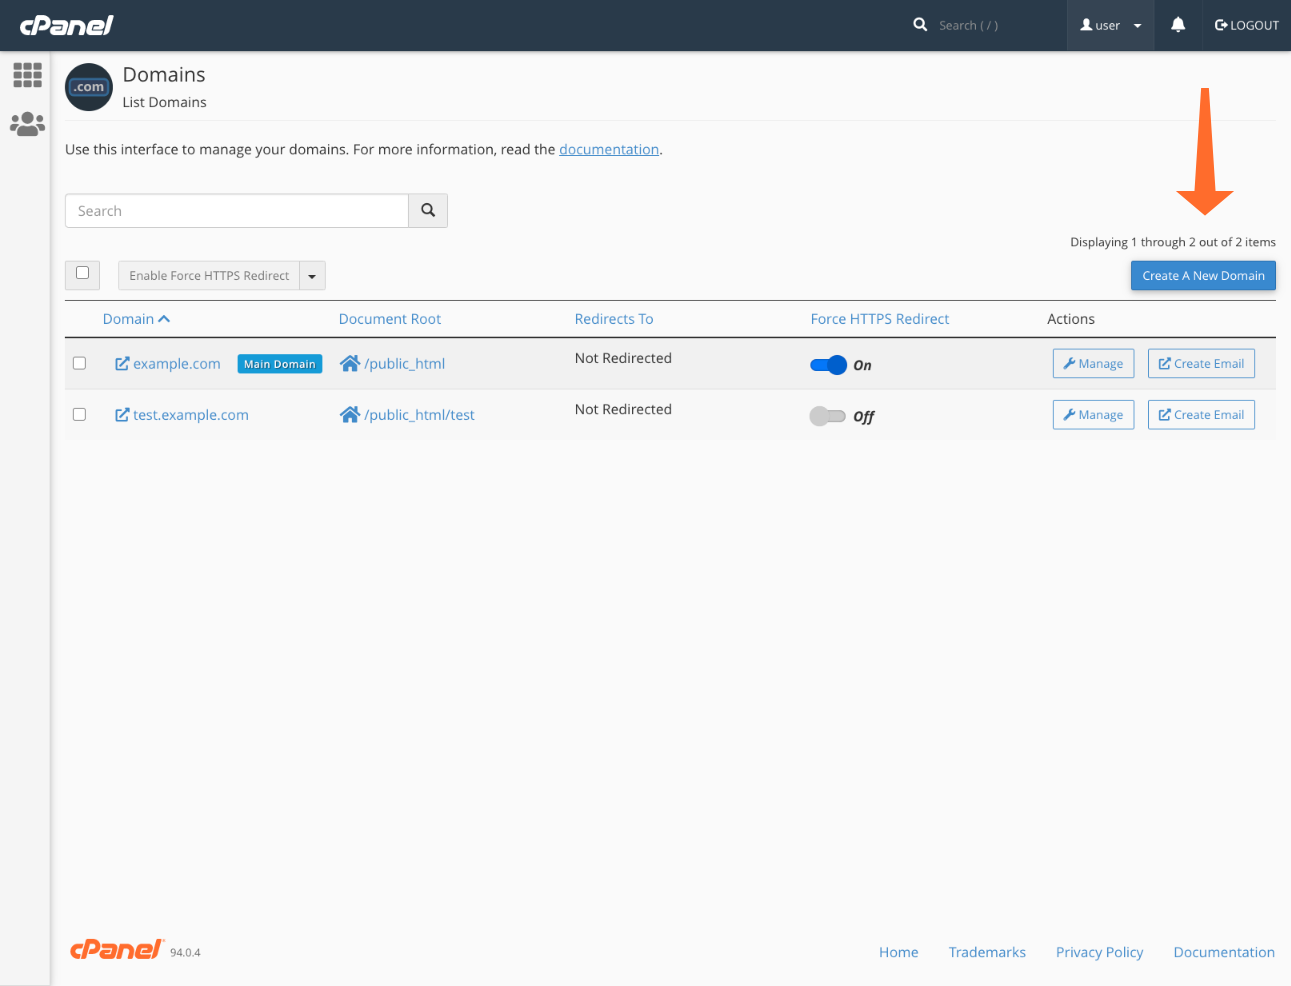
First, access the Domains page in cPanel.
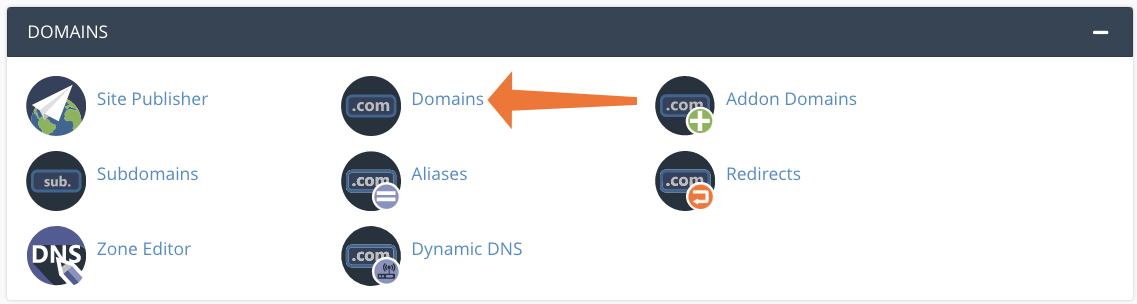
Click Create a New Domain.
Specify the domain name and the document root for the website’s files. The default document root is shared with the account’s primary domain, but you can choose any other directory within your home directory.

Click Submit, and you’re all set! You can now proceed to building your new website.
Configuring Domain Redirects in cPanel & WHM
We’ve discussed redirecting IPs to domains and adding new domains, but what if you need to redirect one domain to another, such as when a brand updates its domain but wants to preserve existing links?
Domain Redirect Codes Explained
Before configuring redirects, understanding the two primary types and their implications for browsers and search engines is essential. When a web client requests a redirected page, the server responds with the page’s new URL and an HTTP status code.
While there are many status codes, those starting with “3” are relevant to redirection. You’ll predominantly use either 301 or 302.
- A 301 redirect indicates the page has moved permanently. It instructs HTTP clients (browsers and search engine crawlers) to update their caches.
- A 302 redirect signifies “Found,” but typically implies that the page has been moved temporarily. The page is currently unavailable at the old URL, but may be in the future, so caching updates aren’t necessary.
The use of “Found” for “Moved Temporarily” might seem counterintuitive, especially considering the existence of a 307 Moved Temporarily code. However, existing.
There’s ongoing debate about the nuances of these codes within the SEO community, but the general consensus favors using 302 when the URL changes temporarily. Browsers and web crawlers generally interpret it that way, even if not explicitly stated. The 307 code is mostly understood in the same way, but there are fringe cases where stick to 302.
How to Configure Domain Redirects in cPanel
You can redirect an entire domain or specific pages; we’ll focus on redirecting an entire domain
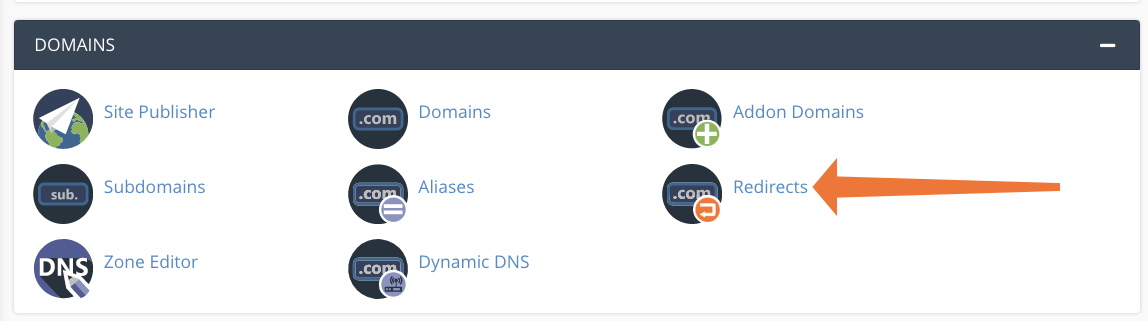
In cPanel, locate the Domains section on the main page and select Redirects.
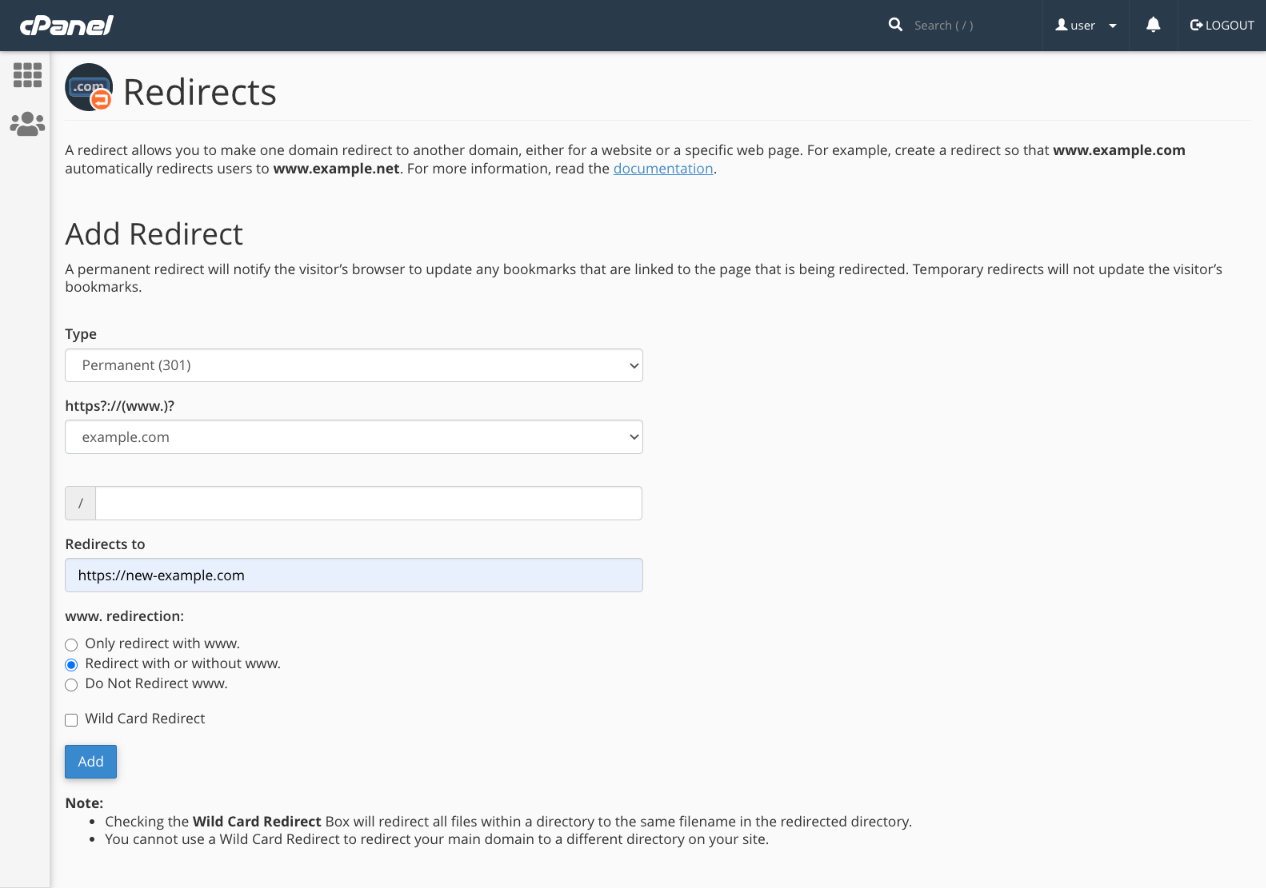
On the Redirects page, choose either Permanent (301) or Temporary (302) from the first dropdown. Then, select the domain you want to redirect from the second dropdown. If you were redirecting a specific page, you’d enter the path in the subsequent field. We’ll leave it blank to redirect the entire domain.
Finally, enter the new destination domain in the Redirects to field. Remember to include the protocol (https://) and click Add.
This is the most straightforward setup. There are additional options for managing the “www” subdomain and a Wild Card Redirect feature that redirects all of a site’s pages to the same URL.
How to Configure Domain Forwarding in WHM
While it’s generally recommended to use cPanel’s domain redirection function for 301 and 302 redirects, you can also forward domains in WHM. Forwarding is often used to temporarily redirect visitors during site maintenance and works differently than standard redirection.
Redirection occurs on the client-side; the browser receives the necessary information to load the new page. Domain forwarding, however, takes place on the server-side and is invisible to the browser because the server and the domain name system handle it.
In WHM, navigate to Domain Functions and select Setup/Edit Domain Forwarding. Click Click to Create and then the Set Up Forwarders button.
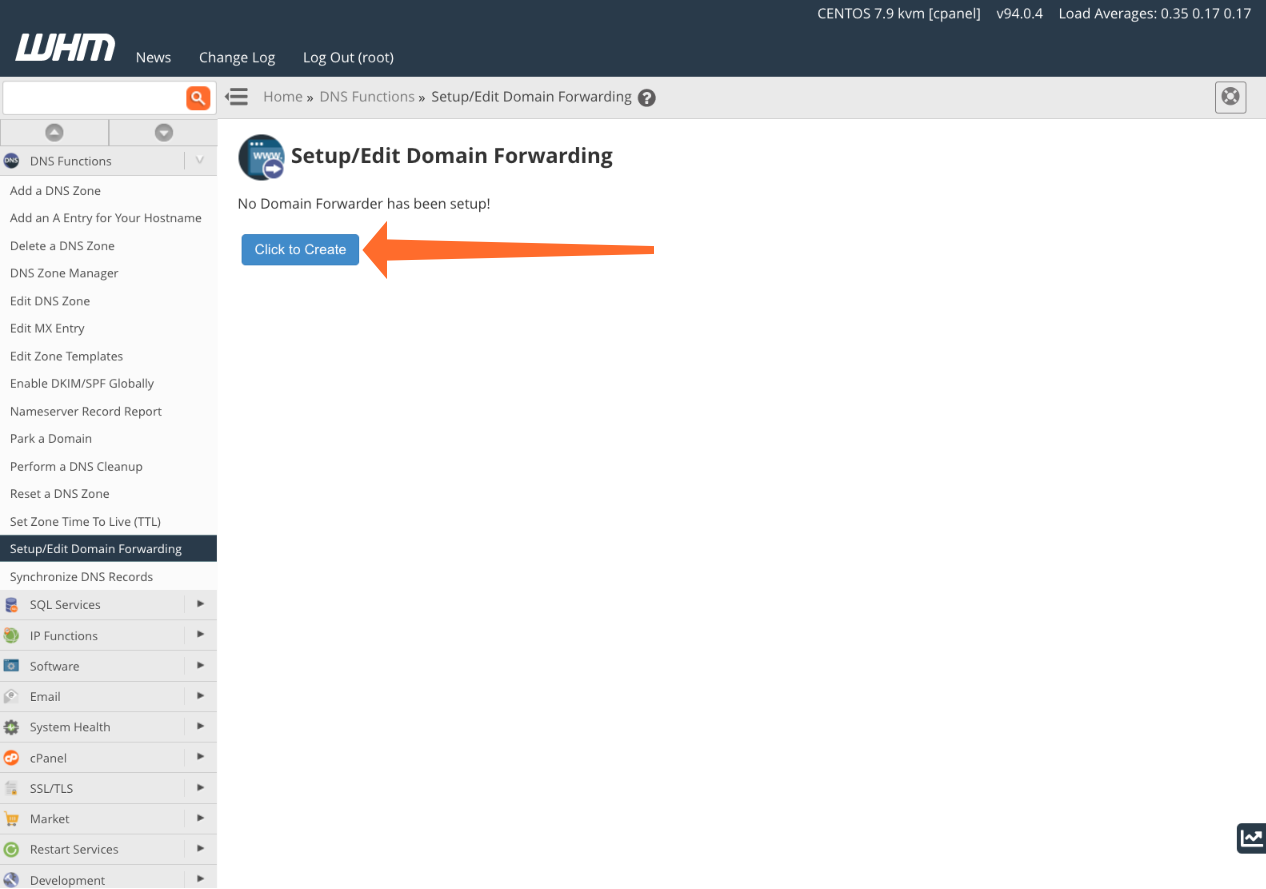
The Domain Forwarding interface is simple. Enter the domains you want to forward in the left column and their respective destination domains in the right column. Click Save Map when you’re finished.
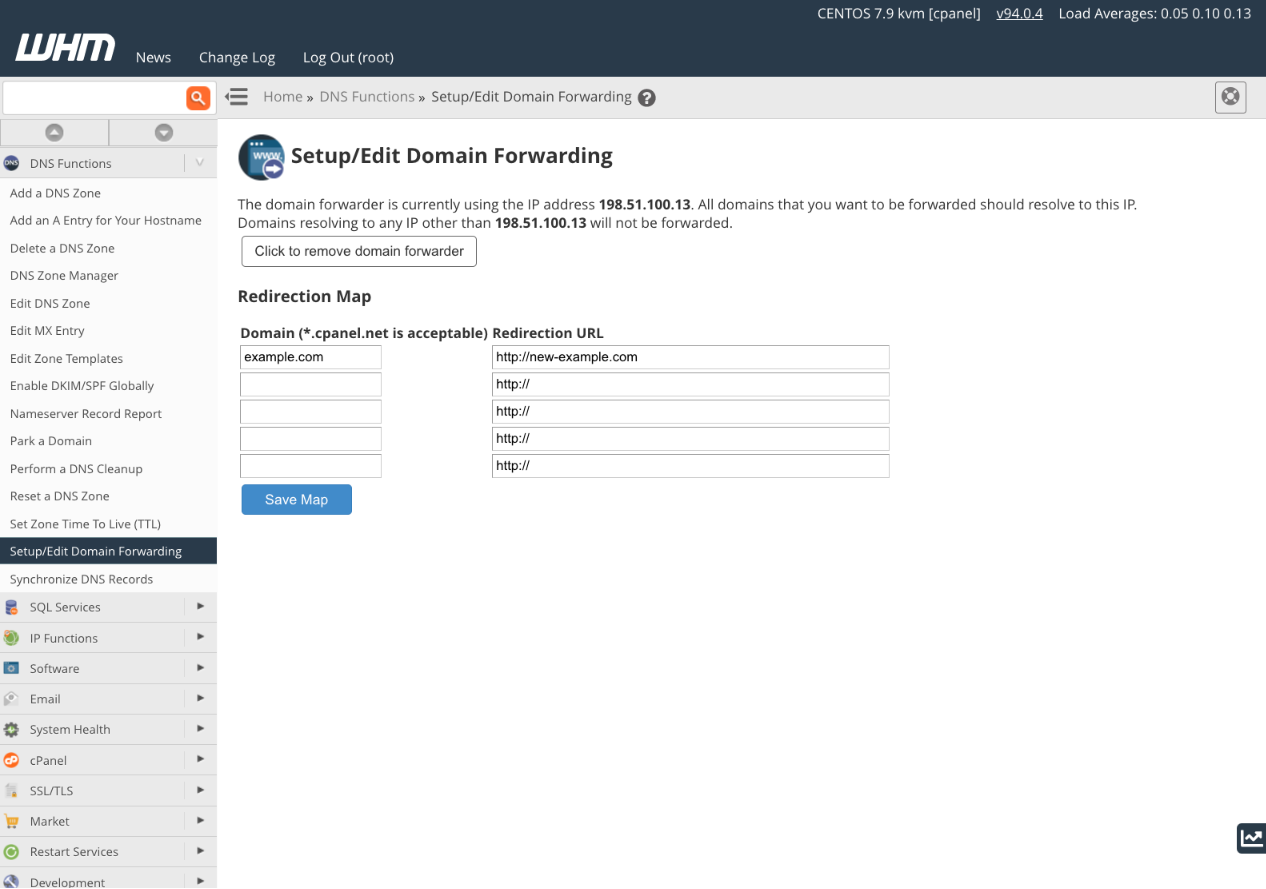
In addition to setting up the forwarder, ensure that the domain resolves to the IP address displayed at the top of the setup page. You can do this by checking, and editing if needed, the domain’s A record in WHM’s DNS Zone Manager (as detailed in our documentation) or via your domain registrar’s DNS record editor if you’re using their nameservers.
How to Flush Your Operating System’s DNS Cache
When you modify domain records or change IP addresses, you might find that you cannot access the website on the server. Instead of loading the site’s pages, you get a 404 “Not Found” error. This might be because the DNS record changes have not yet propagated, but it could also result from stale entries in your operating system’s DNS cache.
DNS records rarely change, and requesting domain name servers takes time. Caching results often speeds things up. The domain’s IP address can then be read from the cache, which is faster than retrieving it from a DNS server across the Internet.
However, if a change is pending and the cached DNS record is out of sync, the web site will not load. Most operating systems allow the cache to be cleared, which forces the OS to get new data from the DNS.
Microsoft® Windows 10
Open the command prompt (“cmd” in the start menu search box), right-click on the entry called Command Prompt and run as administrator. Enter the following command:
ipconfig /flushdns If successful, you’ll see: “Windows IP configuration successfully flushed the DNS Resolver Cache.”
macOS®
On OS X Yosemite and later, open the terminal emulator or type “terminal” into Spotlight. Enter this command followed by the administrator account’s password.
sudo killall -HUP mDNSResponderOn older versions of macOS, use this command:
sudo discoveryutil mdnsflushcacheCentOS
Run this command in a terminal window:
systemctl restart dnsmasq.serviceSee our documentation for information about clearing the DNS cache in other operating systems.
Straightforward Domain Management with cPanel & WHM
cPanel & WHM simplifies the management of IP addresses and domain names, including adding new IP addresses and domains, redirecting domains, and editing zone files. This article has only touched on a few capabilities; for more information, please see the Feature Overview and our documentation.
As always, we welcome any feedback or comments. Please reach out to us on Discord, the cPanel forums, and Reddit. Also, don’t forget to follow us on Facebook, Instagram, and Twitter.


