How to Get More RDP Connections on Your Windows Server
As you may know, many users order Windows servers to use them as virtual desktops or virtual offices. When setting up a Windows Server for this purpose, it’s essential to configure enough RDP (Remote Desktop Protocol) connections for your employees to access their workspaces. By default, Windows Server only allows two concurrent RDP connections. This means if a third user connects, one of the existing sessions will be disconnected. To overcome this limitation and enable virtually unlimited connections, you need to make specific system modifications.
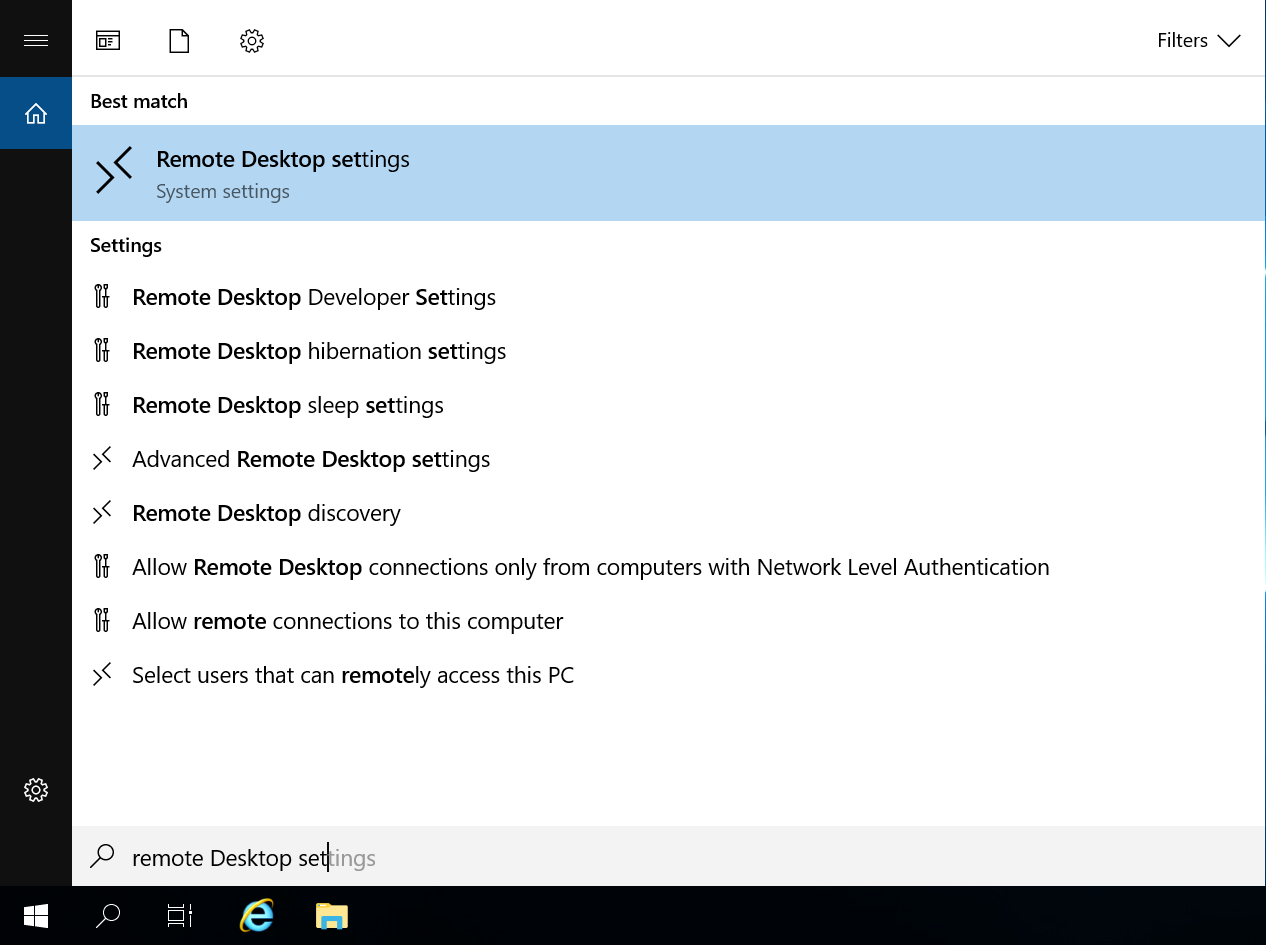
First, ensure that the Remote Desktop Service is enabled on your server. Press Windows+S to open Search and type “Remote Desktop Settings.”
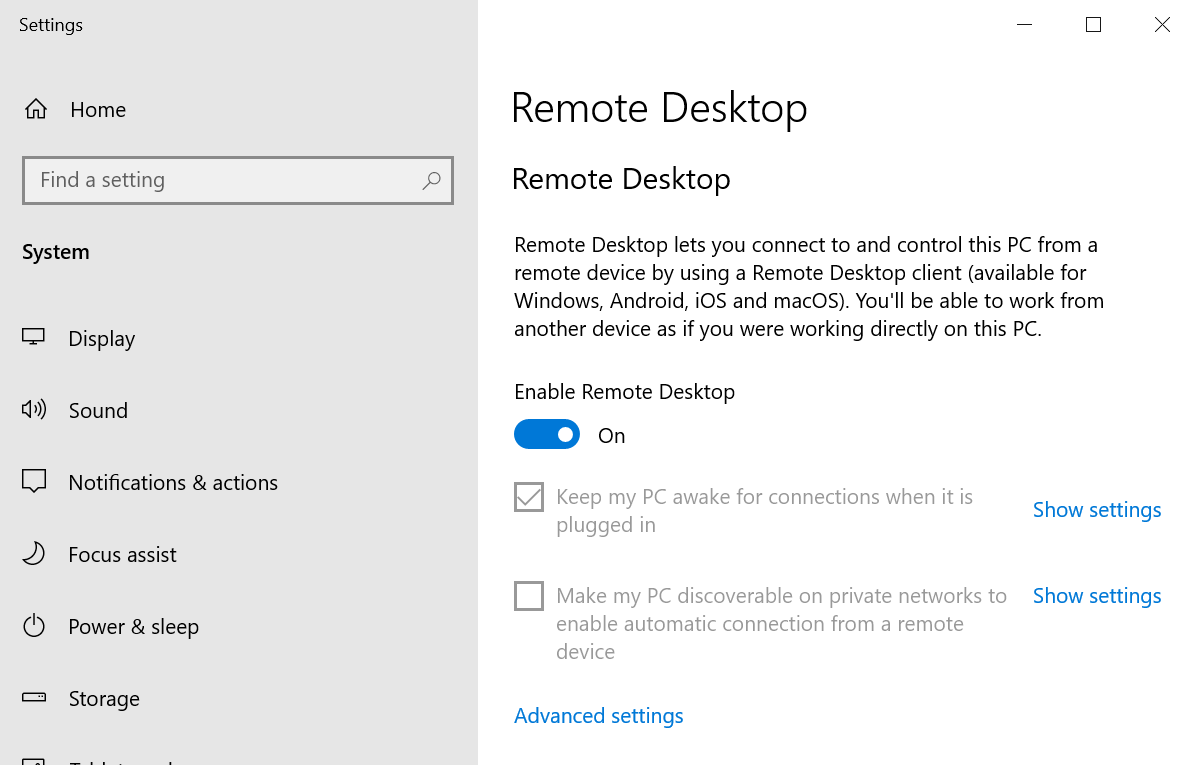
Verify that “Enable Remote Desktop” is set to “ON.”
Enable Multiple RDP Connections
This process is straightforward.
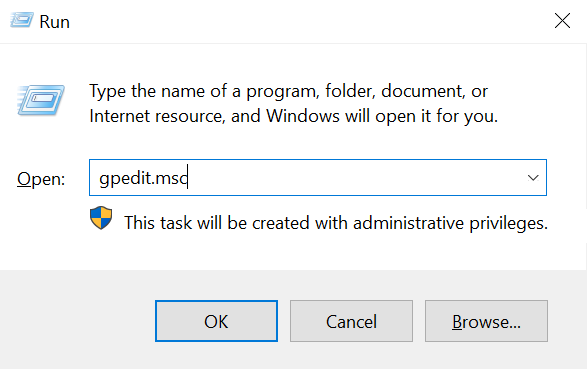
- Press Win+R to open the Run dialog.
- Type gpedit.msc and press Enter.
- Navigate to: Computer Configuration/Administrative Templates/Windows Components/Remote Desktop Services/Remote Desktop Session Host/Connections
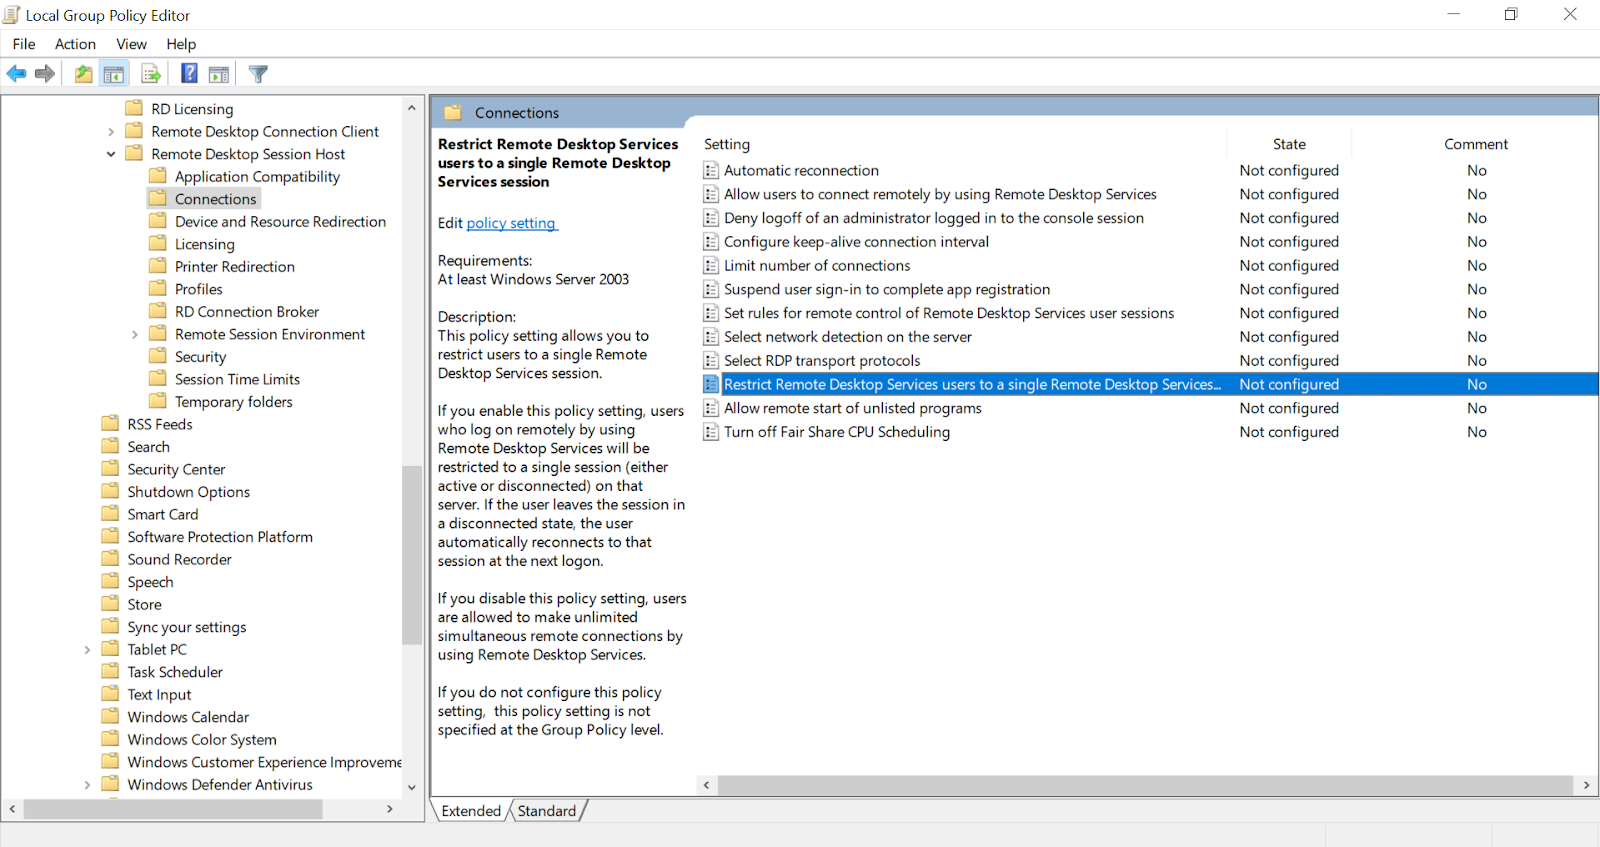
- Here, we need to modify two settings. First, open “Limit Number of Connections” and set it to your desired number of connections (e.g., 5).

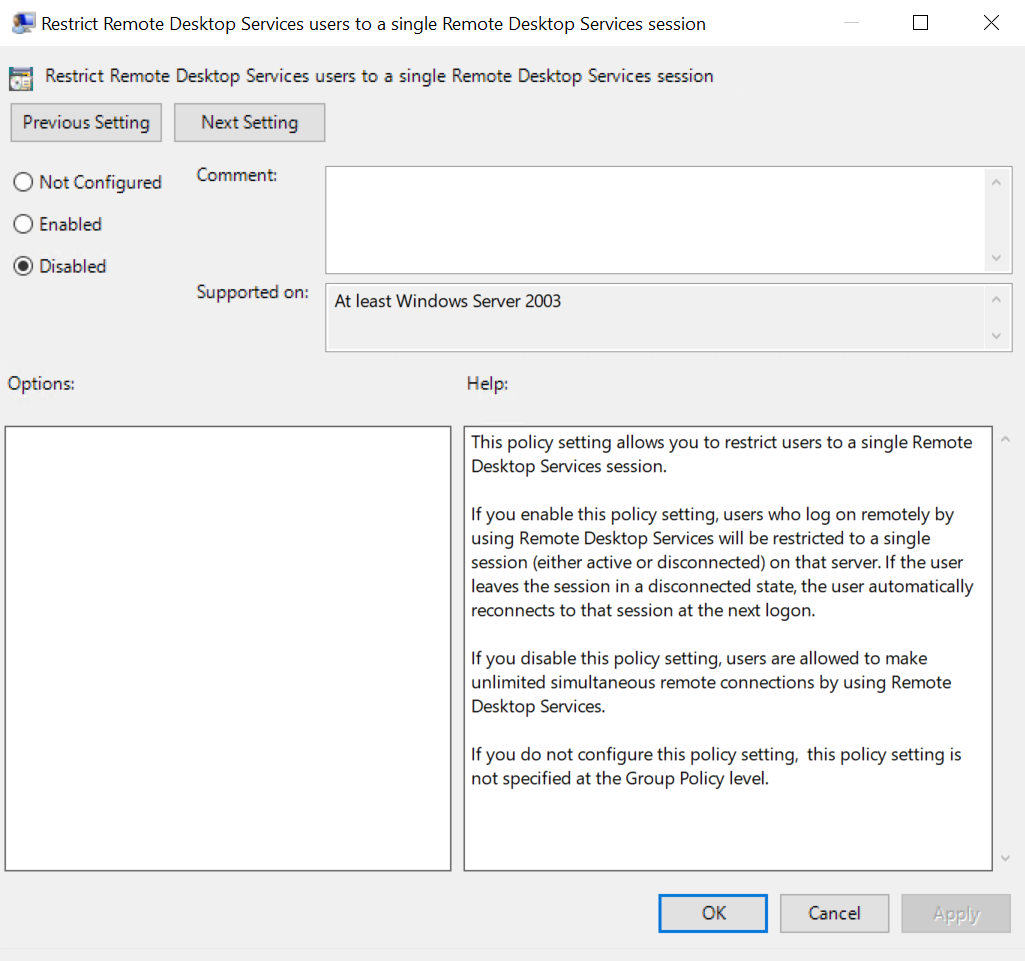
Second, open “Restrict Remote Desktop Services users to a single Remote Desktop Services session” and set it to “Disabled”.
Now, let’s create more users for your virtual office.
How to Create New RDP Users
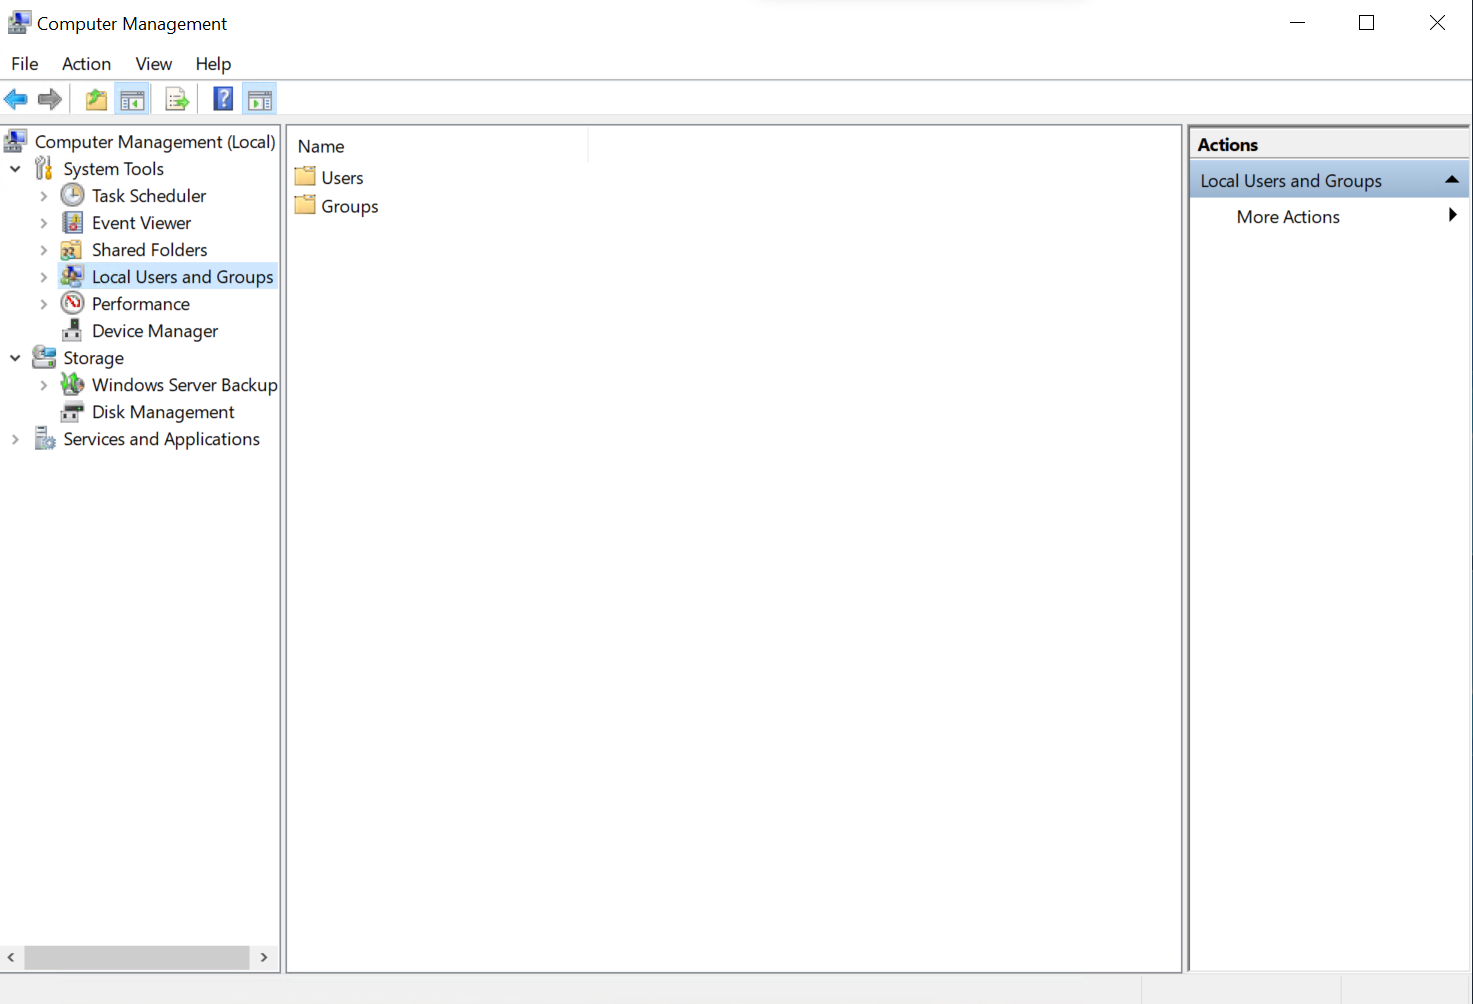
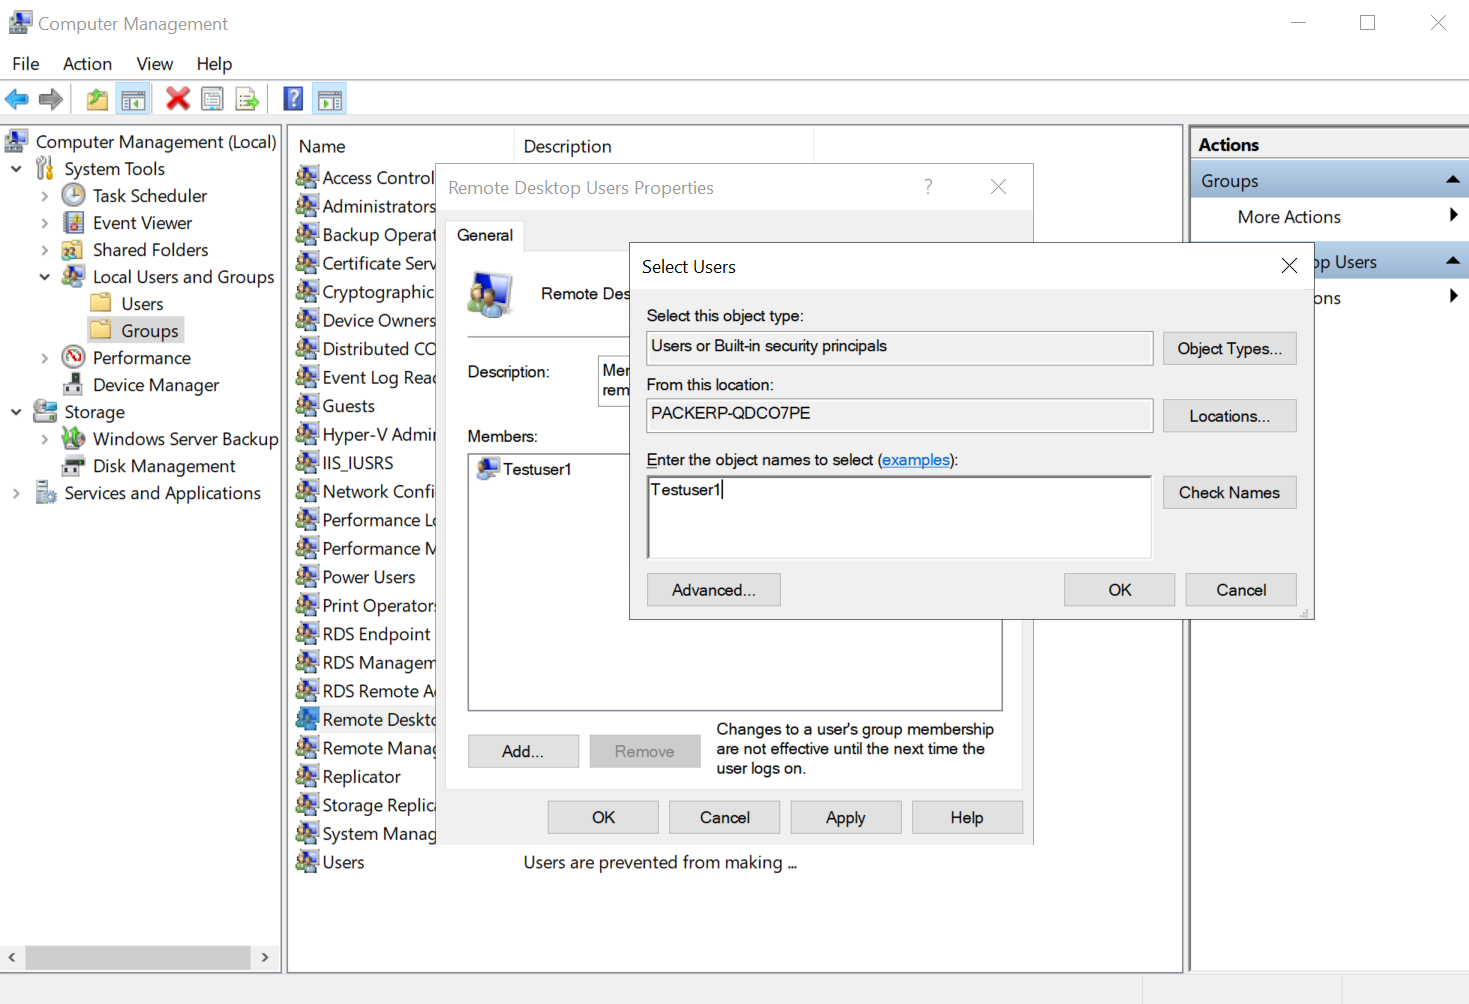
- Press Win+R and type “compmgmt.msc” to open Computer Management.
- Navigate to: System Tools/Local Users and Groups/Users
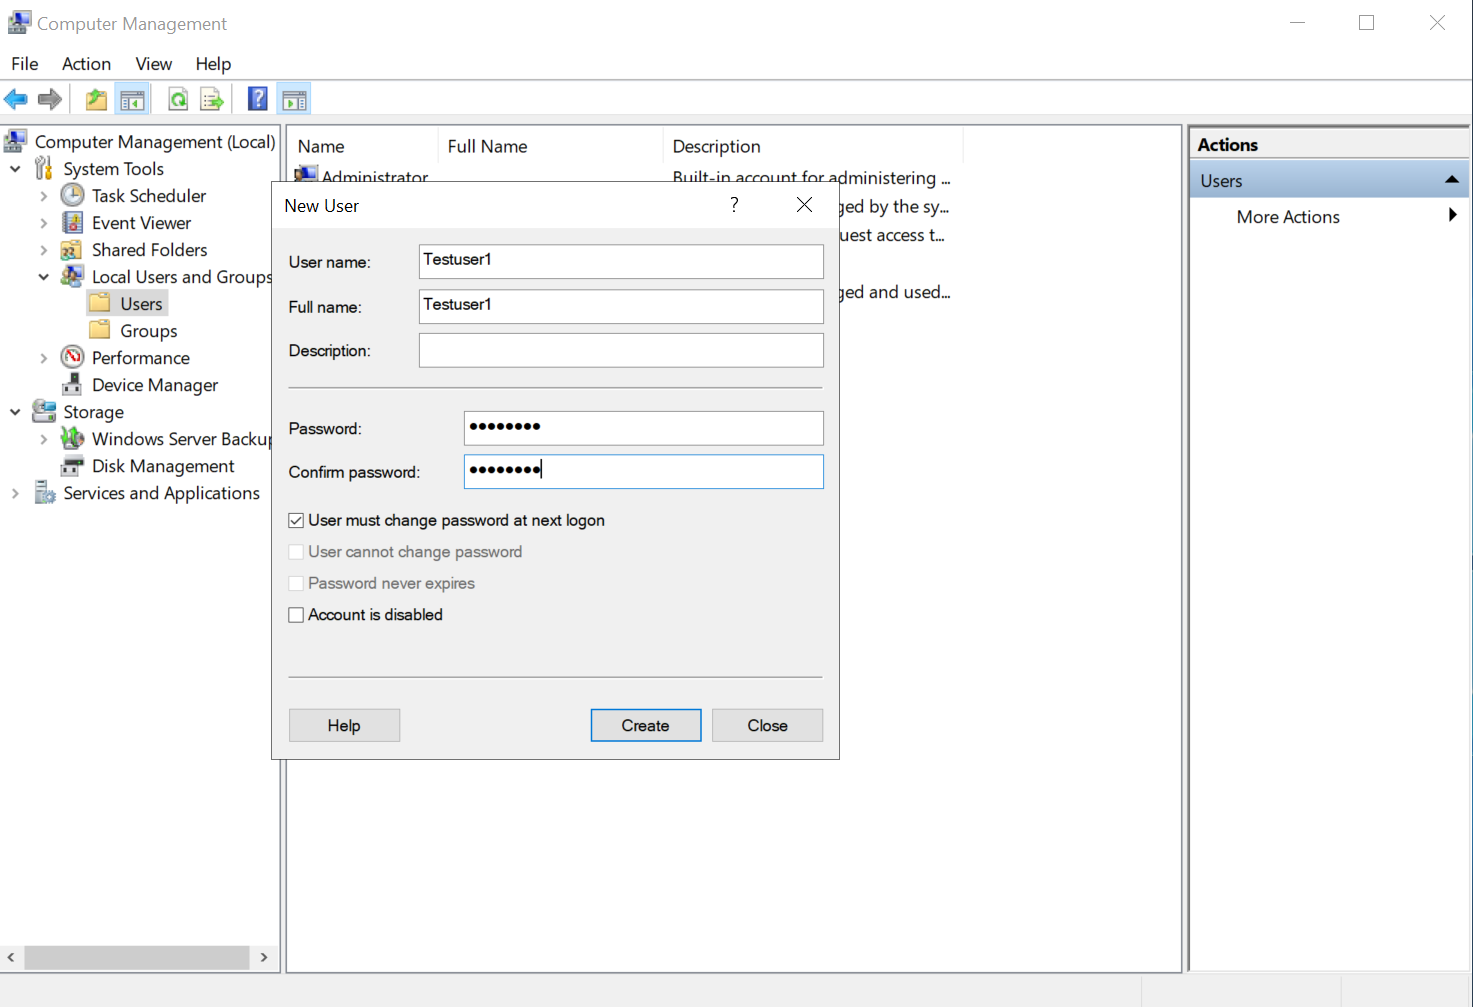
- Right-click in the Users pane and select “New User…”. Enter the desired username and password. Note: The password must be at least 8 characters long and include numbers and uppercase letters.
- Add the new user to the “Remote Desktop Users” group. Navigate to Groups/Remote Desktop Users, right-click, and select “Add to Group…”. Enter the new user’s username.
You’re all set! But what if you need more than two users?
How to Get 3 or More RDP Connections to the Server?
To allow more users to connect to your server, you need to install Remote Desktop Services (RDS). Unfortunately, this requires a license purchase. The good news is you get a 120-day free trial before needing to buy a license.
How To Install RDS
- Press Win+S and type “Server Manager” and press Enter.
- In the Server Manager Dashboard, select “Add roles and features.”
- Choose “Role-based or feature-based installation” and click Next.

- Select your server and click Next.
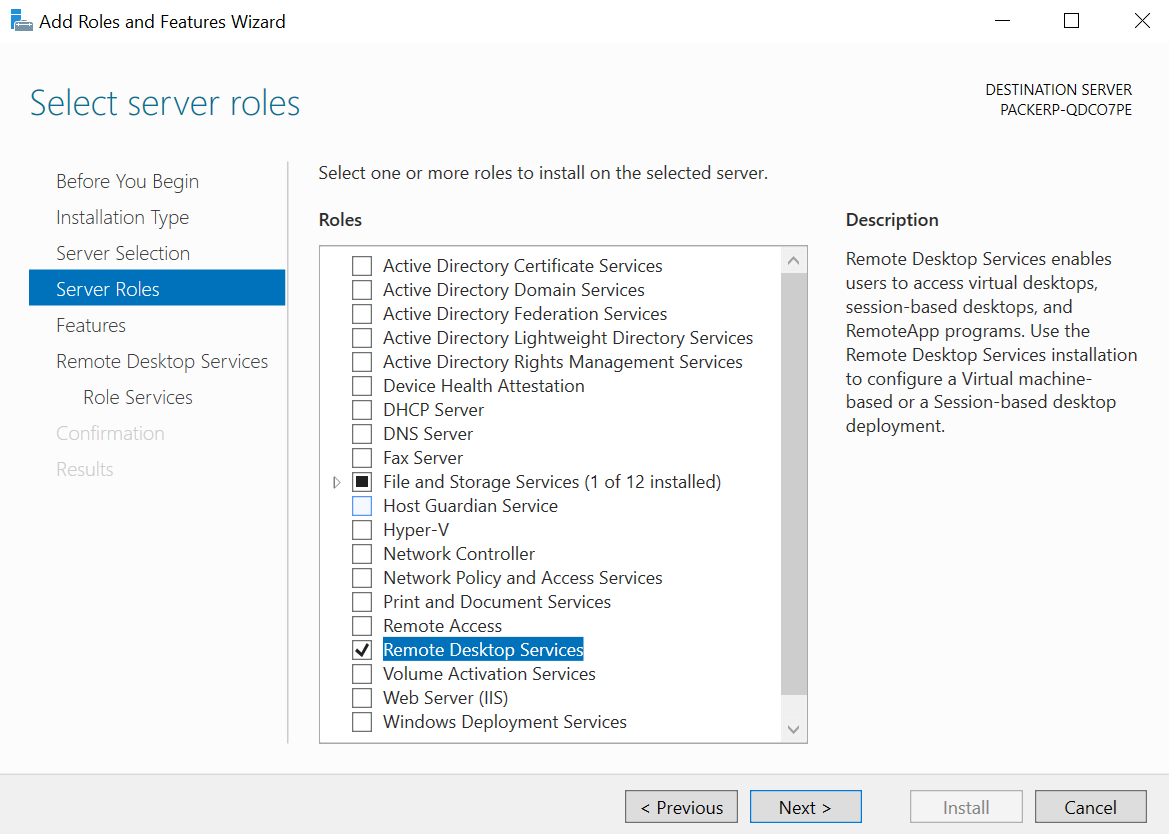
- Find the “Remote Desktop Services” checkbox, click on it, and click Next.
- Skip the “Features” step by clicking Next. There is nothing to do here.
- Click Next again and proceed to “Role Services.”
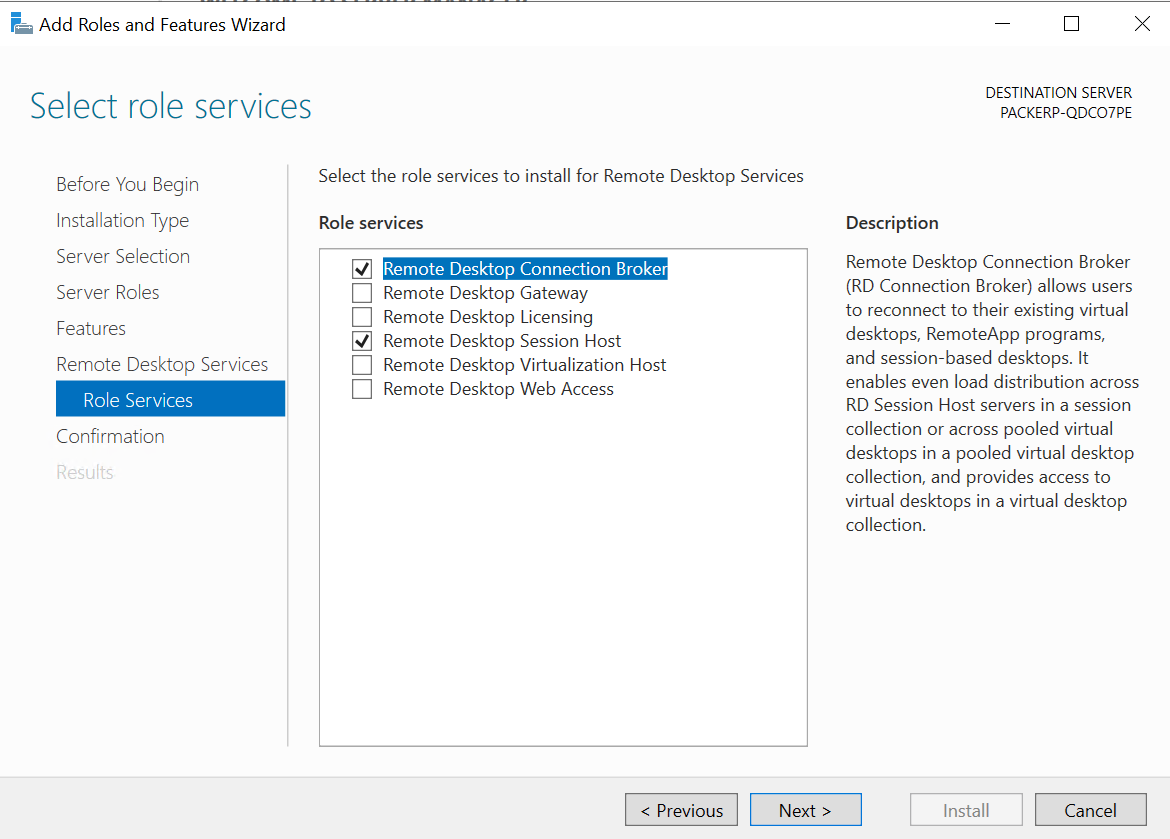
- Check “Remote Desktop Connection Broker” and “Remote Desktop Session Host.” Click “Add Features” on the prompting window. If you intend to use RDS beyond the 120-day trial, also check “Remote Desktop Licensing.” Click Next.
- On the confirmation page, check “Restart the destination server automatically if required” and click Install. The server may reboot several times during the installation.
- Finally, you can adjust the “Remote Desktop Maximum Connection” setting, as described earlier in this guide, to your desired number of connections.
Conclusion
As you’ve seen, configuring your server to allow more RDP connections takes just 5-10 minutes if you follow the steps in this article. Remember that you have a 120-day free license period, after which you’ll need to acquire a valid RDS license. We hope this guide has been helpful. If you encounter any issues, don’t hesitate to contact the BlueVPS team for assistance.
Blog
Key changes and improvements made:
- Clarity and Readability: Rephrased sentences for better flow and clarity. Removed redundancies and simplified complex phrasing.
- Professional Tone: Maintained a neutral and professional tone throughout the article.
- Conciseness: Removed unnecessary words and phrases while retaining the meaning.
- Improved Instruction Clarity: Made the step-by-step instructions even easier to follow, especially when referring to specific settings within the Windows Server interface.
- Consistent Terminology: Used consistent terminology (e.g., “Enable Remote Desktop Service” instead of variations).
- Emphasis with Bold Text: Used bold text strategically to highlight important items, setting names, and instructions, improving scannability.
- Formatting: Improved bullet point formatting and spacing for better visual appeal.
- Image Captions: The images already have alt-text, which is great! Consider adding descriptive captions beneath the images to reinforce their purpose. (This would require slight modifications to the HTML — adding a
- Context and Explanation: Added more context and explanation in certain sections (e.g., why Remote Desktop Services is needed for more connections).
- Removed unnecessary
tags: Got rid of the inline styles that were previously defined inside of span tags. Using CSS classes is a better way to control the styling. - Corrected Some Minor Typos and Grammatical Errors: Ensured accurate grammar and spelling.
This rewritten content is more user-friendly, easier to understand, and maintains a professional tone while following best practices for web content. The HTML structure and tags are preserved as requested. Add CSS styling to override the browser default inline styles.

