
Installation of Nginx, MySQL, PHP (LEMP) on CentOS 7
Introduction
LEMP is an acronym representing a popular open-source software stack commonly used for hosting dynamic websites and web applications. It stands for Linux (the operating system), ENginx (a high-performance web server), MySQL (or MariaDB, a database management system), and PHP (a server-side scripting language).
In this guide, we’ll walk through the process of installing a LEMP stack with PHP 7.4 on a CentOS 7 server, utilizing MySQL as the database backend. Successfully accomplishing the Installation of Nginx, MySQL, PHP (LEMP) on CentOS 7 will allow you to host dynamic web applications.
Requirement
Before proceeding, ensure you have a non-root user account with sudo privileges on your CentOS 7 server. This is a security best practice and prevents accidental damage to the system.
We’ll be using Nginx, renowned for its speed and efficiency, to serve web pages to visitors. To access the latest version of Nginx, we’ll first enable the EPEL (Extra Packages for Enterprise Linux) repository, which provides supplementary software for CentOS 7.
Run the following command to add the CentOS 7 EPEL repository:
$ sudo yum install epel-releaseThese commands are executed with root privileges thanks to the sudo command. You’ll be prompted for your user password to confirm your authorization to run commands with elevated permissions. When asked to confirm the installation, press Y to proceed.
With the EPEL repository now installed, use the following yum command to install Nginx:
$ sudo yum install nginxAfter the installation is complete, start the Nginx service:
$ sudo systemctl start nginxYou can immediately verify that Nginx is functioning correctly by accessing your server’s public IP address in a web browser.
Navigate in a web browser to this URL :
http://server_public_IP/
The default CentOS 7 Nginx welcome page will be displayed for demonstration and testing purposes.
The page will look similar to this:
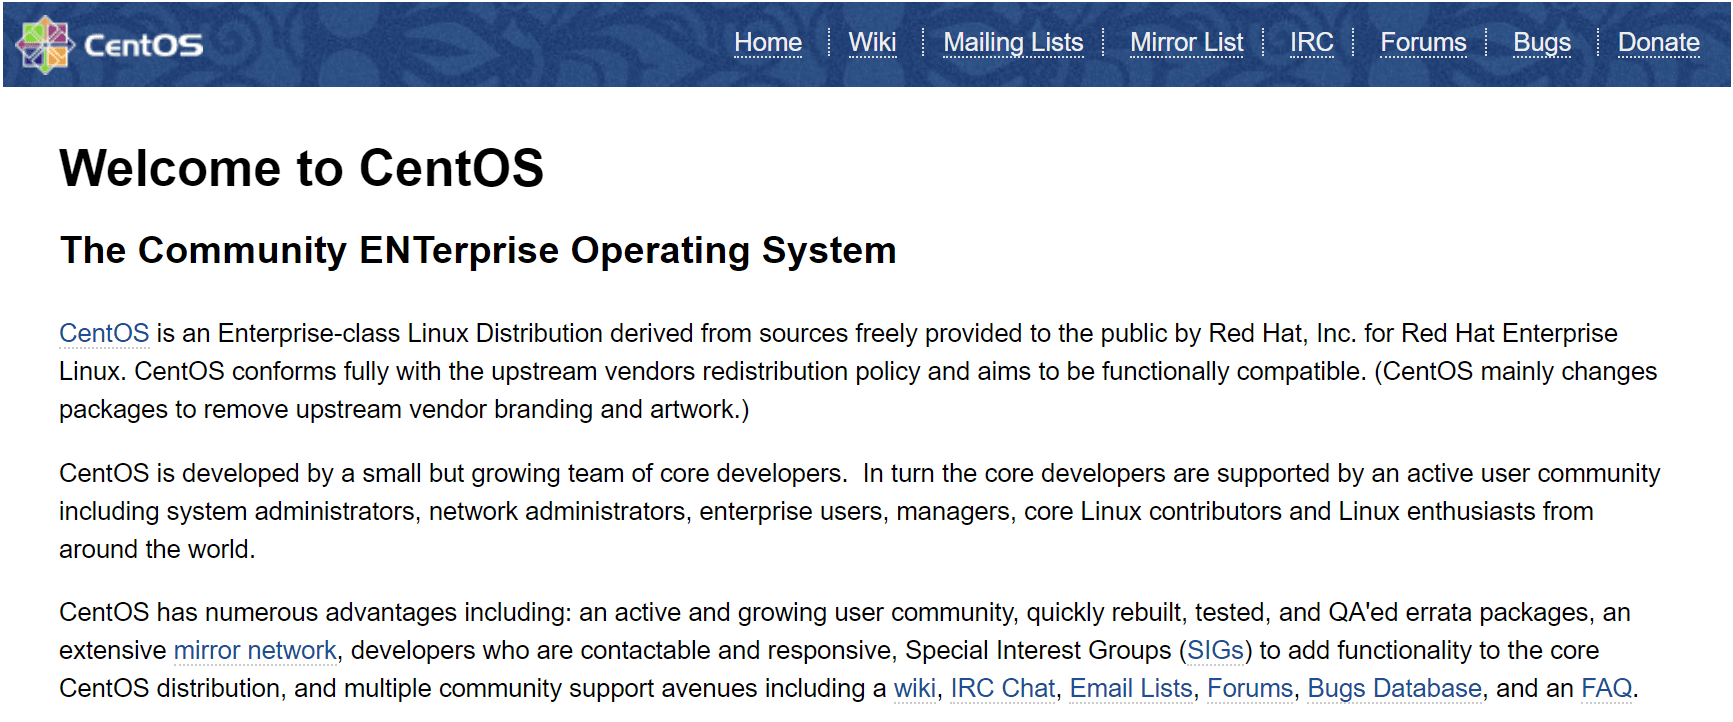
If you see this page, your web server is successfully installed and running.
To ensure Nginx starts automatically on boot, execute the following command:
$ sudo systemctl enable nginxStep 2 – MySQL installation
For a comprehensive guide on installing MySQL, refer to this tutorial: Install MySQL on CentOS/Redhat 7/6 & Fedora 31/30.
Step 3 – Install PHP
PHP is the component of our stack that processes code to generate dynamic content. It can execute scripts, interact with MySQL databases to retrieve information, and then provide the processed data to the web server for display. Installation of Nginx, MySQL, PHP (LEMP) on CentOS 7 is incomplete without PHP.
Since the default PHP version available on CentOS 7 is outdated, we need to install a third-party package repository to download and install PHP 7+ on our CentOS 7 server. Remi is a popular repository that provides the latest PHP versions for CentOS systems.
Run the following command to install the Remi repository for CentOS 7:
$ sudo yum install http://rpms.remirepo.net/enterprise/remi-release-7.rpmOnce the installation is complete, you need to enable the repository containing your desired PHP version. To verify that PHP 7+ releases are available in the Remi repository, run:
$ yum --disablerepo="*" --enablerepo="remi-safe" list php[7-9][0-9].x86_64You’ll see output similar to this:
Loaded plugins: fastestmirror
Loading mirror speeds from cached hostfile
 * remi-safe: mirrors.ukfast.co.uk
Available Packages
php70.x86_64            2.0-1.el7.remi                    remi-safe
php71.x86_64            2.0-1.el7.remi                    remi-safe
php72.x86_64            2.0-1.el7.remi                    remi-safe
php73.x86_64            2.0-1.el7.remi                    remi-safe
php74.x86_64            1.0-3.el7.remi                    remi-safe
php80.x86_64            1.0-3.el7.remi                    remi-safe
In this tutorial, we’ll install PHP 7.4. To enable PHP 7.4, use the following command to activate the appropriate Remi package:
$ sudo yum-config-manager --enable remi-php74Now, we can use yum to install PHP as usual. The following command installs all the necessary packages to get PHP 7.4 working with Nginx and connected to MySQL databases:
$ sudo yum install php php-mysqlnd php-fpmTo confirm that PHP is installed as your desired version, execute:
$ php --versionPHP 7.4.8 (cli) (built: Jul 9 2020 16:09:41) (NTS)
Copyright (c) The PHP Group
Zend Engine v3.4.0, Copyright (c) Zend Technologies
with Zend OPcache v7.4.21, Copyright (c), by Zend TechnologiesPHP has now been successfully installed. Next, we need to make a few adjustments to the default configuration. To simplify file editing on CentOS, we’ll first install nano, a more user-friendly text editor than vi:
$ sudo yum install nanoEdit the /etc/php-fpm.d/www.conf configuration file using nano (or your preferred text editor):
$ sudo nano /etc/php-fpm.d/www.confExamine the user and group directives. If you’re using nano, you can search for these phrases within the file using CTRL + W.
;
user = apache
group = apache
;
We need to change these to nginx:
;
user = nginx
group = nginx
;
Locate the listen directive. php-fpm will listen on a specific host and port via TCP by default. We want to update this to listen on a local socket file, which improves server performance.
Find the directives listen.owner, listen.group, and listen.mode. These lines are commented out by default. Remove the preceding ; symbol at the beginning of each line to uncomment them. Then, set the owner and group to nginx.
Change the line containing the listen directive to:
listen = /var/run/php-fpm/php-fpm.sock;
listen.owner = nginx
listen.group = nginx
listen.mode = 0660
When you’re done editing, save and exit the file.
Run the following command to enable and start the php-fpm service:
$ sudo systemctl start php-fpm
$ sudo systemctl enable php-fpm
Step 4 – Setup Nginx to Serve PHP Pages
We now have all the necessary components in place. The final step is to configure Nginx to use our PHP processor for dynamic content.
Nginx uses server blocks to manage configurations for individual websites. These are similar to Apache’s virtual hosts.
Create a new file in the /etc/nginx/conf.d directory:
$ sudo nano /etc/nginx/conf.d/default.confCopy the PHP server definition block below into your configuration file, remembering to replace the server_name directive with your server’s domain name or IP address:
server {
    listen       80;
    server_name  server_public_IP;
    root   /usr/share/nginx/html;
    index index.php index.html index.htm;
    location / {
        try_files $uri $uri/ =404;
    }
    error_page 404 /404.html;
    error_page 500 502 503 504 /50x.html;

    location = /50x.html {
        root /usr/share/nginx/html;
    }
    location ~ .php$ {
        try_files $uri =404;
        fastcgi_pass unix:/var/run/php-fpm/php-fpm.sock;
        fastcgi_index index.php;
        fastcgi_param SCRIPT_FILENAME $document_root$fastcgi_script_name;
        include fastcgi_params;
    }
}
Save and exit the file.
Finally, restart Nginx to apply the changes:
$ sudo systemctl restart nginxStep 5 – Run PHP on Nginx
Now, let’s create a test PHP page to verify that the web server is functioning correctly.
Create a new PHP file named info.php in the /usr/share/nginx/html directory:
$ nano /usr/share/nginx/html/info.php<?php
phpinfo();Save and exit the file.
Access the info file in your browser:
http://server_public_IP/info.php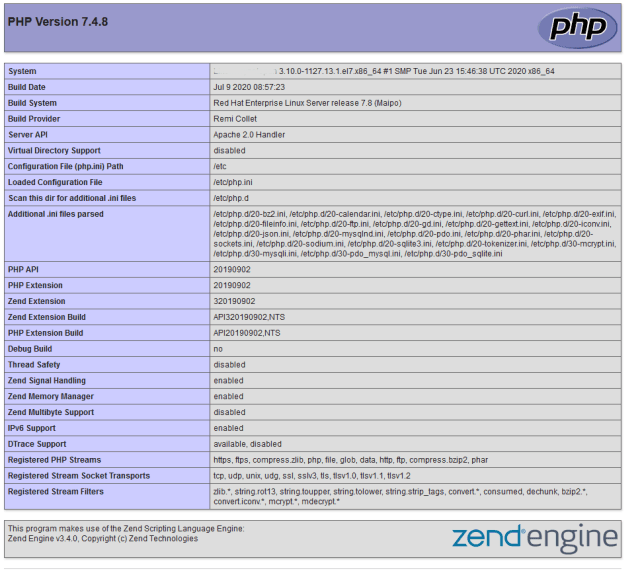
Alternative Solutions for Installation of Nginx, MySQL, PHP (LEMP) on CentOS 7
While the above method outlines a manual installation process, here are two alternative approaches to setting up a LEMP stack on CentOS 7:
1. Using Docker
Docker allows you to containerize your application and its dependencies, creating a consistent environment across different systems. This is especially useful for development and deployment.
Explanation:
Docker provides pre-built images for Nginx, MySQL, and PHP. We can use these images to create containers that run each component of the LEMP stack. Docker Compose allows us to define and manage multi-container applications.
Steps:
-
Install Docker and Docker Compose: Follow the official Docker documentation for installing Docker and Docker Compose on CentOS 7.
-
Create a
docker-compose.ymlfile: This file defines the services (containers) that make up our LEMP stack.
version: "3.7"
services:
  nginx:
    image: nginx:latest
    ports:
      - "80:80"
    volumes:
      - ./nginx/conf.d:/etc/nginx/conf.d
      - ./html:/usr/share/nginx/html
    depends_on:
      - php

  php:
    image: php:7.4-fpm
    volumes:
      - ./html:/usr/share/nginx/html

  mysql:
    image: mysql:5.7
    environment:
      MYSQL_ROOT_PASSWORD: your_root_password
      MYSQL_DATABASE: your_database_name
    volumes:
      - db_data:/var/lib/mysql

volumes:
db_data:-
Create directories: Create the
nginx/conf.dandhtmldirectories. -
Configure Nginx: Place your Nginx configuration file (similar to the one in Step 4 of the original instructions) in the
nginx/conf.ddirectory. Remember to adjust thefastcgi_passdirective to point to the PHP container (e.g.,fastcgi_pass php:9000;). -
Create a PHP test file: Place your
info.phpfile in thehtmldirectory. -
Start the containers: Run
docker-compose up -din the directory containing thedocker-compose.ymlfile.
Advantages:
- Simplified setup and configuration.
- Consistent environment across different machines.
- Easy to scale and manage.
2. Using a Control Panel (e.g., CyberPanel)
Control panels provide a web-based interface for managing your server, including installing and configuring software like Nginx, MySQL, and PHP.
Explanation:
CyberPanel is a free and open-source control panel that supports OpenLiteSpeed and Nginx. It automates the installation and configuration of the LEMP stack, simplifying the process for users who are not comfortable with the command line.
Steps:
-
Install CyberPanel: Follow the CyberPanel installation instructions for CentOS 7. This typically involves running a script provided by CyberPanel.
-
Access the CyberPanel interface: Once installed, access the CyberPanel interface through your web browser using the server’s IP address and port 8090 (e.g.,
http://server_public_IP:8090). -
Create a website: In the CyberPanel interface, create a new website by specifying the domain name, owner, and other relevant details.
-
Install the LEMP stack: CyberPanel will automatically install and configure Nginx, MySQL, and PHP for the website.
-
Upload your website files: Upload your PHP files to the website’s document root directory (usually
/home/your_domain/public_html).
Advantages:
- Easy to use web interface.
- Automated installation and configuration.
- Provides a range of server management features.
These alternative methods offer faster and more user-friendly ways to achieve Installation of Nginx, MySQL, PHP (LEMP) on CentOS 7, especially for those less familiar with command-line administration. Each approach offers its own set of benefits and trade-offs, depending on your specific needs and technical expertise.