How to install Virtualmin on Ubuntu BlueVPS | BlueVPS
Virtualmin is a flexible and powerful web hosting control panel for Linux-based operating systems. Its open-source nature means it benefits from extensive community support, making it easy to find answers to common questions. Premium support, including Virtualmin Pro, is also available, offering added features like unlimited support tickets, priority assistance, script installers, an HTML editor, and mobile access. For more details, visit their official website: https://www.virtualmin.com/.
Virtualmin’s cost-effectiveness and comprehensive features make it a popular choice among professionals worldwide.
Prerequisites
Before starting, ensure you have Ubuntu OS installed on your server. You can order a VPS with Ubuntu pre-installed from BlueVPS, choosing from any of our 12 locations. Simply select Ubuntu 20.04 during the order process, and your VPS will be ready within minutes.
To connect to your new VPS, you can use a free SSH client like Putty (http://www.chiark.greenend.org.uk/~sgtatham/putty/).
Install Putty and enter your SSH username, SSH password, and SSH port to establish a connection with your server.
If you’re unsure of your credentials, check your welcome email received after purchasing the VPS; it contains all the necessary information.
After connecting, create a non-root user with sudo access. This process is compatible with Ubuntu versions up to 20.04 LTS.
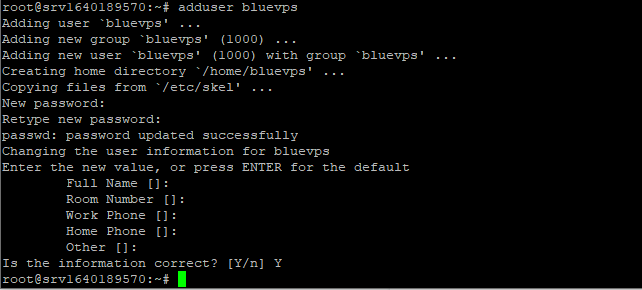
1. Create the new user account using the `adduser` command. Ensure you select a strong password with mixed-case characters. You can enter values for the user’s information or leave them blank. Here, we use “bluevps” as the username.
# adduser bluevps
- Adding user ` bluevps ‘ …
- Adding new group `bluevps’ (1001) …
- Adding new user `bluevps’ (1001) with group `bluevps’ …
- Creating home directory `/home/bluevps’ …
- Copying files from `/etc/skel’ …
- New password:
- Retype new password:
- passwd: password updated successfully
- Changing the user information for bluevps
- Enter the new value, or press ENTER for the default
- Full Name []: bluevps user
- Room Number []:
- Work Phone []:
- Home Phone []:
- Other []:
Is the information correct? [Y/n] y
2. Add the user to the Sudo Group
# adduser bluevps sudo

3. Switch to the new user
# su - bluevps

Verify you are the new user with whoami, then test sudo access with sudo whoami. It should return root.
$ whoami
bluevps
$ sudo whoami
[sudo] password for bluevps:
root

Step-by-step guide on how to install Virtualmin on Ubuntu
With the prerequisites completed, let’s move on to the installation process.
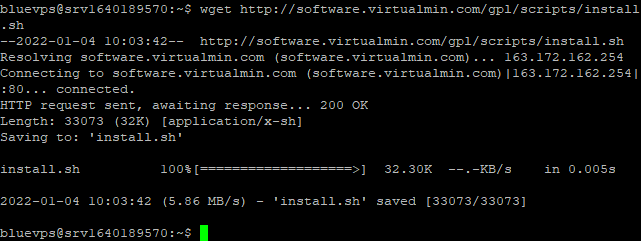
1. Download the Virtualmin installation script.
$ wget http://software.virtualmin.com/gpl/scripts/install.sh
2. Set the domain name for your server. For example:
$ sudo hostnamectl set-hostname abcdtestdomain.xyz
3. Make the script executable.
$ chmod a+x install.sh
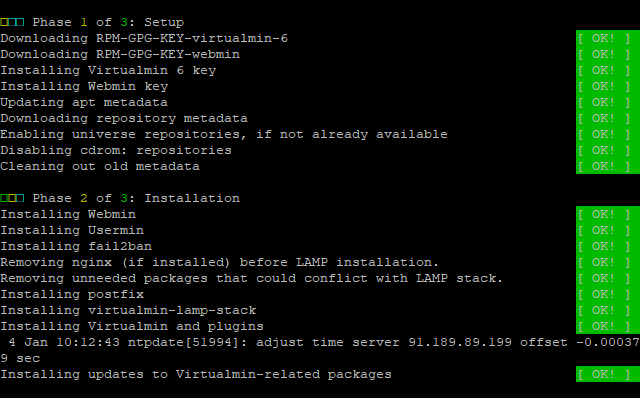
4. Run the script to install both Webmin and Virtualmin, as Virtualmin is based on Webmin. The installation process should resemble this:
$ sudo ./install.sh
The install.sh script offers several options for customization:
–uninstall : Removes all Virtualmin packages
–help : This message
–force : Skip confirmation message
–hostname : Set fully qualified hostname
–verbose : Verbose
–setup : Setup software repositories and exit (no installation or configuration)
–minimal : Install a smaller subset of packages for low-memory/low-resource systems
–bundle : Choose bundle to install (LAMP or LEMP, defaults to LAMP)
5. Allow access to Virtualmin through the firewall.
$ sudo ufw allow 10000
6. Navigate to port 10000 at the server’s domain name to access the Virtual Web Interface. For example:
http://abcdtestdomain.xyz:10000
Conclusion
The installation is complete! You can now access the Virtualmin panel using your root username and password. If you encounter any issues, please contact our technical support team via the ticketing system or live chat. Best of luck!
Blog