To begin, download and extract your SSL certificate files. You can locate the download link in your fulfillment email or within your Bluehoster’s SSL Manager account. The downloaded files, in PKCS#7 (P7B) format, will include a .cer file that contains your domain’s SSL server certificate, along with any necessary intermediate CA certificates. Copy this .cer file to the same server where you generated the Certificate Signing Request (CSR).
your_domain_com.cer
Step 1: Open IIS Manager
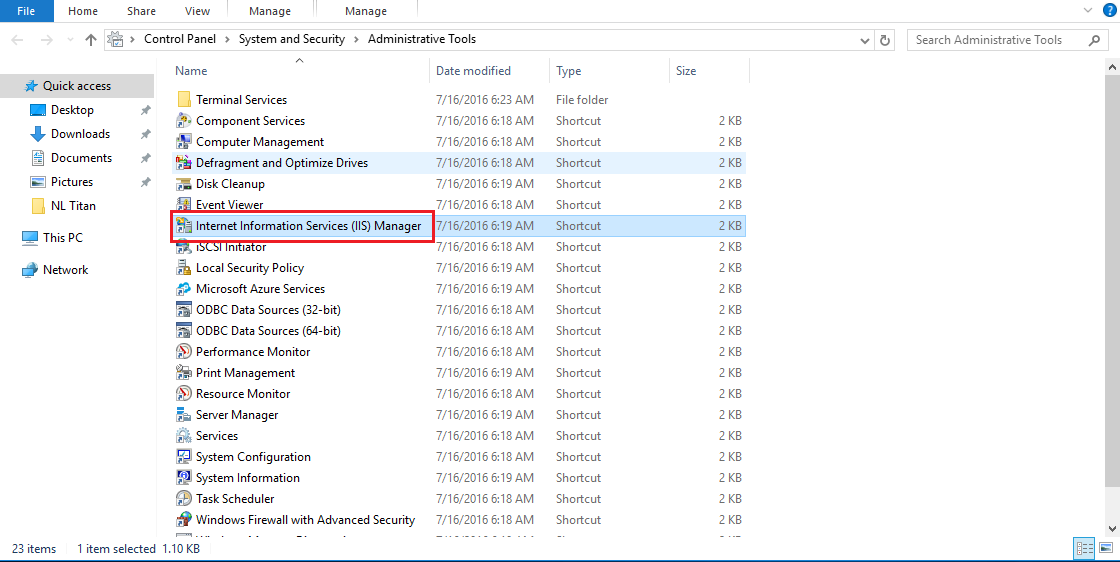
Launch the Internet Information Services (IIS) Manager. You can access this by going to: Control Panel > System and Security > Administrative Tools > Internet Information Services (IIS) Manager from the Start menu.
Step 2: Access Server Certificates
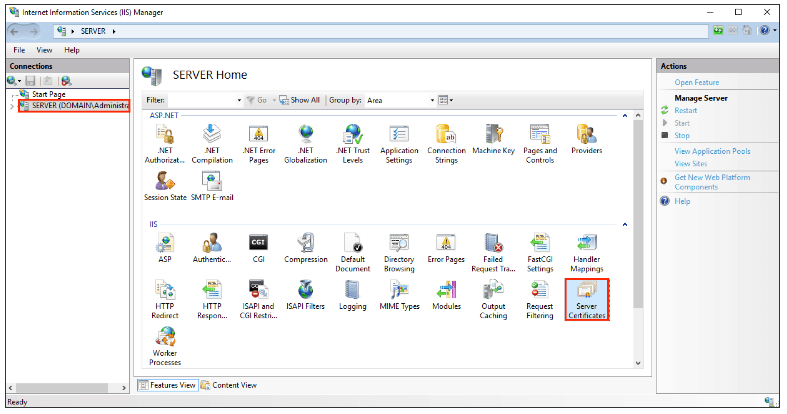
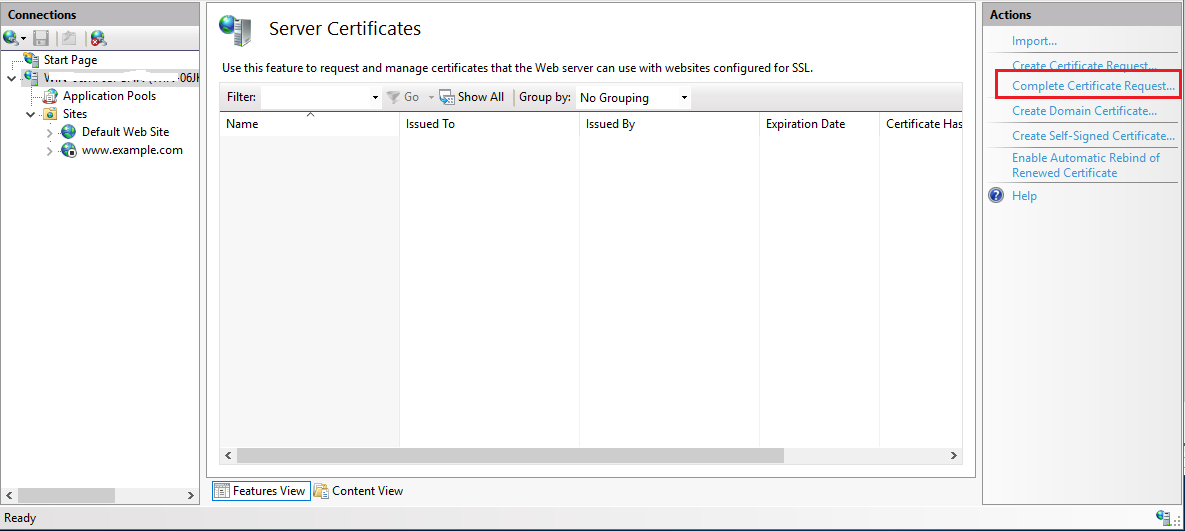
In the IIS Manager, find your server node on the top left under “Connections“. Double-click on “Server Certificates“.
Step 3: Complete Certificate Request
On the top right side, in the “Actions” pane, click on “Complete Certificate Request“.
Step 4: Locate and Import Certificate
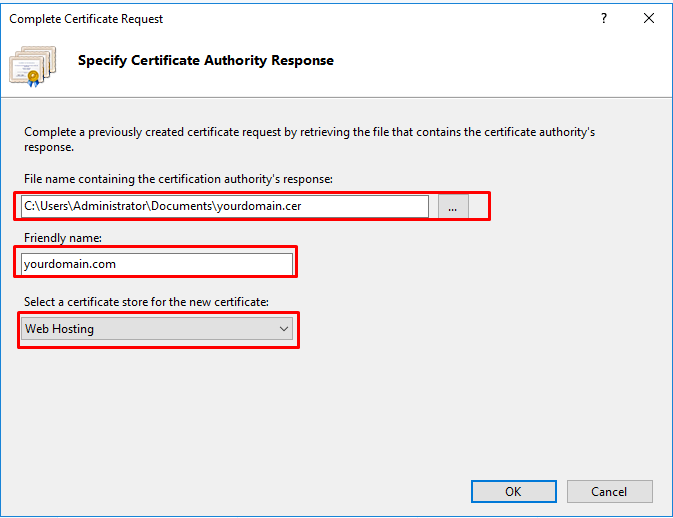
Browse to the downloaded .cer file (your_domain_name.cer). You will then be prompted to enter a “friendly name,” used for easy reference (e.g. example.com). Under “Select a certificate store for the new certificate:“, select “Personal“.
Step 5: Install Certificate
Click “OK” to install the SSL certificate.
Important Note: A known issue with IIS may cause a “Failed to remove the certificate” error. However, if you are using the same server where the CSR was generated, the certificate should be successfully deployed in most situations. To verify, close this window and press F5 to refresh the certificate list. If your new certificate is present in the list, it has been installed successfully. If not, a new CSR and certificate reissue will be required.
Step 6: Assign Certificate to Website
Now that you have successfully installed the certificate on the server, you need to associate it with the appropriate website in IIS.
Step 7: Select Server
Navigate back to the main IIS Manager window, and under “Connections,” select the server where the certificate has been installed.
Step 8: Choose the Website
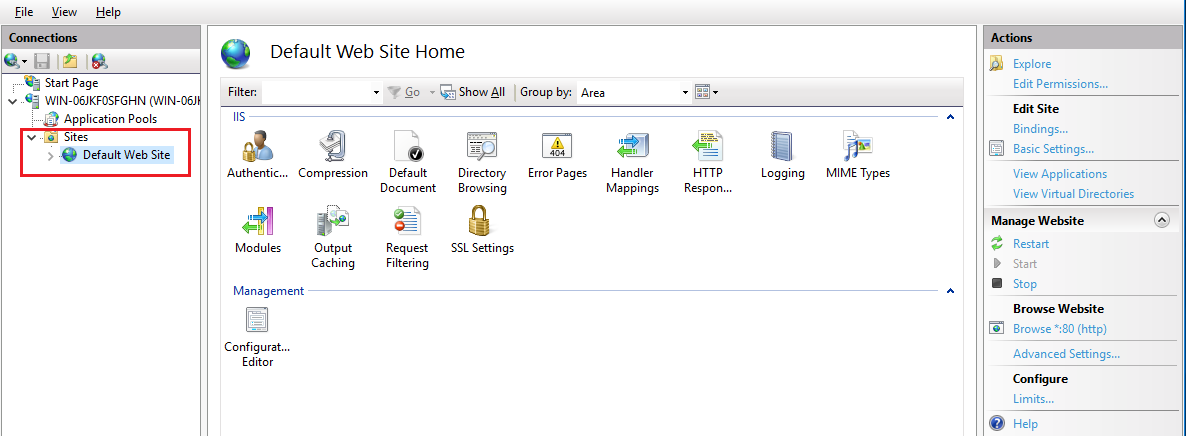
From “Sites,” select the specific website you wish to secure with SSL.
Step 9: Access Bindings
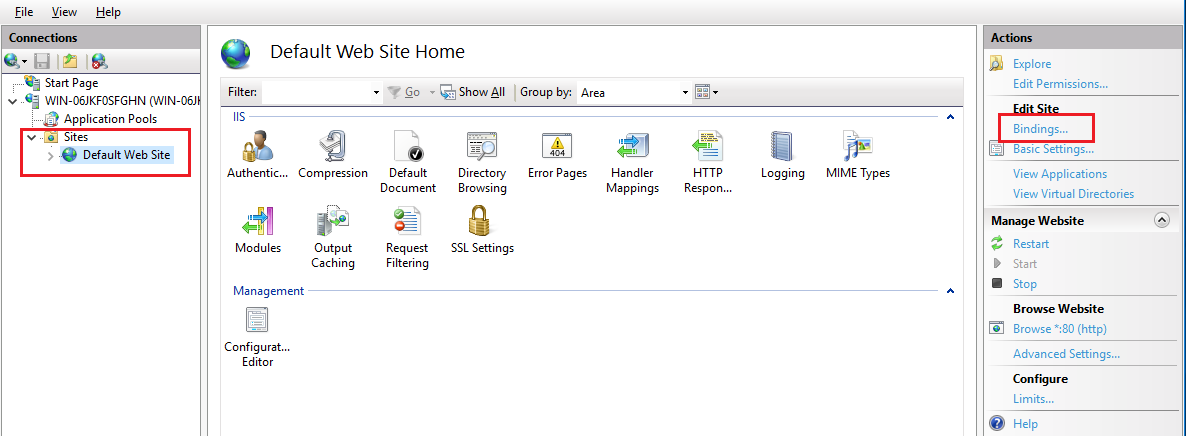
In the “Actions” menu on the right, click “Bindings…” to open the “Site Bindings” window.
Step 10: Add New Binding
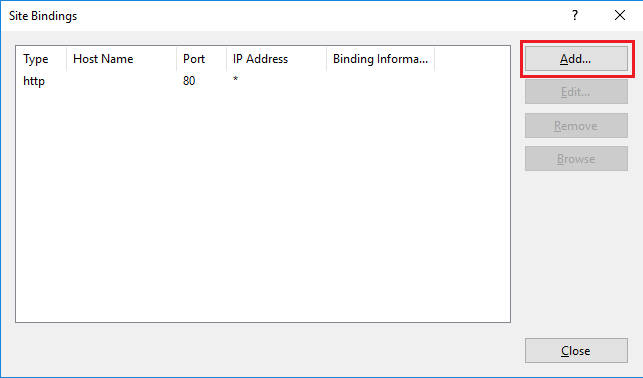
In the “Site Bindings” window, click “Add…” to get the “Add Site Binding” window.
Step 11: Configure HTTPS Binding
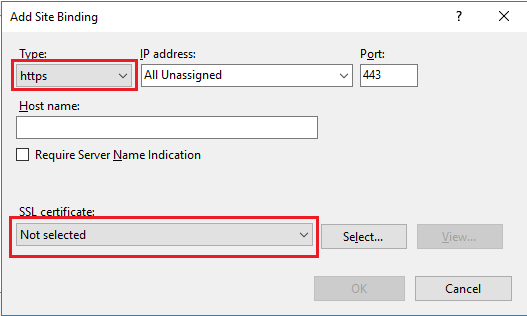
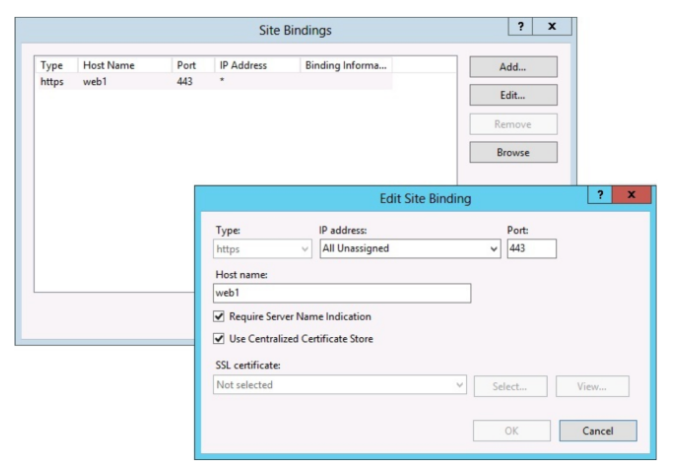
In the “Add Site Binding” window: Select “https” for “Type“. The “IP address” should either be the website’s specific IP address or “All Unassigned”. The standard port for SSL traffic is 443, which you should enter in the “Port” field. From the option “SSL Certificate“, choose the certificate you just installed. If you have already configured SSL, then an HTTPS type will already be listed in the bindnigs pane. In that situation, you’ll select the existing HTTPS type and click the “Edit” option.
Step 12: Select the Certificate
Choose the installed certificate from the “SSL Certificate” dropdown. If it’s a new binding, also set the “Type” to “HTTPS”, “IP address” to “All Unassigned”, and “Port” to 443.
Step 13: Save Changes
Click “OK“. Then, close the “Site Bindings” window.
Step 14: Additional Bindings (SANs)
If your certificate has multiple Site Names (SANs) you must repeat the binding process for each site.
Verification Steps:
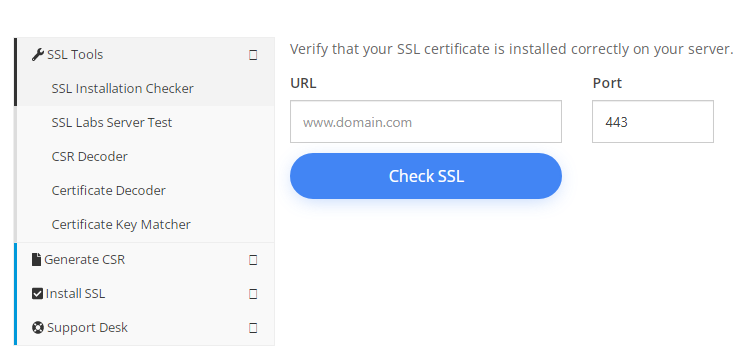
- Use tools such as the Certificate Installation Checker or SSL Checker to check for proper installation.
- Test your SSL certificate by using a browser to connect to your server, making sure to use the https protocol. For example, if your SSL was acquired for secure.mysite.com, enter https://secure.mysite.com in your browser.
- If the SSL certificate is properly installed and the server is configured correctly, you will notice a locked padlock icon in your browser.
This completes the installation of the SSL certificate on Microsoft IIS as well as assigning it to your website.
