
Set Up Password Authentication With Apache on Ubuntu 18.04/20.04/22.04 LTS
Apache remains a dominant force in the web server landscape, renowned for its versatility and extensive features. Its modular architecture, robust media support, and seamless integration with other software make it a preferred choice for developers and administrators worldwide. This guide provides a step-by-step walkthrough on how to implement password authentication on an Apache web server running on Ubuntu 18.04, 20.04, or 22.04 LTS. Securing your web content with password protection is a crucial step in maintaining data confidentiality and controlling access to sensitive information. Let’s dive into the process of setting up Set Up Password Authentication With Apache on Ubuntu 18.04/20.04/22.04 LTS.
Requirements
Before starting, ensure you have the following:
- An Ubuntu 18.04/20.04/22.04 LTS server with Apache installed.
sudoprivileges to execute administrative commands.
Step 1 : Creating a Password File
The cornerstone of password authentication is the password file itself. Apache uses this file to verify user credentials against stored, encrypted passwords. The htpasswd utility is the tool of choice for creating and managing this file.
To create the password file and add the first user, execute the following command:
$ sudo htpasswd -c /etc/apache2/.htpasswd <username>Replace <username> with the desired username. The -c flag is crucial when creating the file for the first time. It instructs htpasswd to create a new file. You will be prompted to enter and confirm the password for the user. Choose a strong, unique password to enhance security.
For adding subsequent users to the same password file, omit the -c flag:
$ sudo htpasswd /etc/apache2/.htpasswd <username>This command adds the specified <username> to the existing /etc/apache2/.htpasswd file without overwriting it. Again, you’ll be prompted to enter and confirm the user’s password.
To verify the contents of the password file, use the cat command:
$ cat /etc/apache2/.htpasswdThis will display the usernames and their corresponding encrypted passwords stored in the file.
Step 2 : Configuring Apache
With the password file in place, the next step is to configure Apache to utilize it for authentication. This involves modifying the Apache configuration file associated with the directory you wish to protect. This can be the root directory (/var/www/html) or any subdirectory within your web server’s document root.
To restrict access to the root directory, edit the default virtual host configuration file:
$ sudo nano /etc/apache2/sites-enabled/000-default.confIf you intend to protect a specific subdirectory, locate and edit the relevant virtual host or directory configuration file within the sites-enabled directory.
Within the appropriate <Directory> block (e.g., <Directory /var/www/html>), add the following configuration directives:
<Directory /var/www/html>
    AuthType Basic
    AuthName "Restricted Content"
    AuthUserFile /etc/apache2/.htpasswd
    Require valid-user
</Directory>
Let’s break down each directive:
AuthType Basic: Specifies the authentication type as "Basic," a widely supported authentication scheme.AuthName "Restricted Content": Sets the authentication realm name. This name is displayed in the browser’s authentication dialog box, informing users about the protected resource.AuthUserFile /etc/apache2/.htpasswd: Defines the path to the password file created in Step 1. Apache will use this file to authenticate users.Require valid-user: Enforces that only users with valid credentials (i.e., those listed in theAuthUserFile) are granted access to the protected resource.
After adding these directives, save and close the configuration file.
Step 3 : Restart Apache
To activate the changes, restart the Apache web server:
$ sudo systemctl restart apache2This command reloads the Apache configuration files, applying the newly configured password authentication settings.
Conclusion
Following these steps, Apache should now be configured to require password authentication for the specified directory. When a user attempts to access the protected directory, they will be presented with an authentication prompt similar to this:
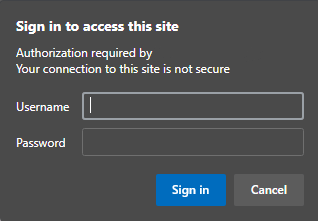
Upon entering valid credentials, the user will gain access to the protected content. Incorrect credentials will result in an error message, denying access. Setting up Set Up Password Authentication With Apache on Ubuntu 18.04/20.04/22.04 LTS is a great way to secure your website.
Alternative Solutions for Password Authentication
While the htpasswd method is a common and straightforward approach, other options offer enhanced security and flexibility. Here are two alternative solutions for implementing password authentication in Apache:
1. Using Digest Authentication
Digest authentication is an improvement over Basic authentication. Basic authentication sends passwords in plaintext (though encoded) over the network, which is vulnerable to interception. Digest authentication, on the other hand, uses a hash function to encrypt the password before sending it, providing better security.
Explanation:
Digest authentication works by sending a hash of the username, realm, password, and other data elements between the client and server. The server can then verify the hash without ever needing to know the actual password in plaintext.
Implementation:
-
Create a Digest Password File: Use the
htdigestutility instead ofhtpasswd.sudo htdigest -c /etc/apache2/.htdigest realm <username>Replace
realmwith a descriptive name for the authentication realm. You will be prompted for the user’s password. -
Configure Apache: Modify your Apache configuration file to use Digest authentication.
<Directory /var/www/html>
    AuthType Digest
    AuthName "Restricted Content"
    AuthDigestFile /etc/apache2/.htdigest
    Require valid-user
</Directory>
AuthType Digest: Specifies the authentication type as Digest.AuthDigestFile: Points to the digest password file.
-
Restart Apache: Restart the Apache server to apply the changes.
sudo systemctl restart apache2
Digest authentication offers a more secure alternative to Basic authentication without requiring significant changes to the Apache configuration.
2. Using a Database for Authentication (e.g., MySQL)
For more complex authentication scenarios, such as managing a large number of users or integrating with existing user management systems, using a database for authentication is a more scalable and flexible solution. This approach requires installing and configuring a database (like MySQL or PostgreSQL) and an Apache module that can interface with the database.
Explanation:
This method involves storing user credentials (usernames, hashed passwords, and potentially other user data) in a database. An Apache module then queries the database to authenticate users when they attempt to access protected resources. This allows for more sophisticated user management, including features like password resets, role-based access control, and integration with other applications.
Implementation (Example using mod_auth_mysql):
-
Install
mod_auth_mysql: This module allows Apache to authenticate against a MySQL database.sudo apt-get install libapache2-mod-auth-mysqlEnable the module:
sudo a2enmod auth_mysql -
Create a MySQL Database and User Table: Create a database and a table to store user credentials.
CREATE DATABASE authentication;
USE authentication;

CREATE TABLE users (
    username VARCHAR(50) NOT NULL PRIMARY KEY,
    password VARCHAR(255) NOT NULL
);
You’ll also need to hash the passwords before storing them in the database. Use a strong hashing algorithm like bcrypt or Argon2. For example, using PHP:
<?php
$password = 'securepassword';
$hashedPassword = password_hash($password, PASSWORD_DEFAULT);
echo $hashedPassword;
?>
Insert the username and the hashed password into the
userstable. -
Configure Apache: Modify the Apache configuration to use the database for authentication.
<Directory /var/www/html>
    AuthType Basic
    AuthName "Restricted Content"
    AuthBasicProvider mysql
    AuthMySQLHost localhost
    AuthMySQLUser apache_user
    AuthMySQLPassword 'apache_password'
    AuthMySQLDB authentication
    AuthMySQLUserTable users
    AuthMySQLNameField username
    AuthMySQLPasswordField password
    Require valid-user
</Directory>
AuthBasicProvider mysql: Specifies that MySQL is the authentication provider.AuthMySQLHost,AuthMySQLUser,AuthMySQLPassword,AuthMySQLDB: Database connection details. Create a dedicated MySQL user for Apache with limited privileges.AuthMySQLUserTable,AuthMySQLNameField,AuthMySQLPasswordField: Specify the table and column names for usernames and passwords.
-
Restart Apache: Restart the Apache server to apply the changes.
sudo systemctl restart apache2
This approach offers significant advantages in terms of scalability, security (when using strong password hashing), and flexibility for managing user accounts. However, it requires more setup and configuration than the htpasswd or htdigest methods. Successfully implement Set Up Password Authentication With Apache on Ubuntu 18.04/20.04/22.04 LTS is a worthwhile achievement.