How to Install Ansible on Ubuntu 22.04? (Step by Step Guide)
Ansible is a powerful tool for system administrators and DevOps engineers aiming to streamline IT automation. Its efficiency greatly benefits both small and large server environments. Developed by Red Hat, Ansible is an open-source automation solution praised for its simplicity and adaptability.
Unlike many configuration management tools, Ansible doesn’t require installing agents on managed nodes. It leverages SSH for secure communication, making it lightweight and easy to implement. Ansible excels in configuration management, application deployment, and complex workflow orchestration. Its declarative language allows you to define your infrastructure as code, enabling version control and easy sharing. Ansible’s parallel task execution and modular architecture make it an ideal choice for scalable and efficient automation.
This guide provides a straightforward, beginner-friendly approach to install Ansible on Ubuntu 22.04. By following these steps, you’ll be well on your way to leveraging this powerful automation tool.
Prerequisites
This tutorial uses a setup with three machines:
- A control machine where Ansible will be installed. This machine uses SSH to manage the hosts.
- Two managed hosts (also called Ansible hosts) that will be automated by the control machine. You’ll need sudo privileges on both the control machine and the managed hosts to execute commands.
How to Install Ansible on Ubuntu? (Installation Steps)
Installing Ansible on Ubuntu is relatively easy compared to other IT systems.
The key is properly configuring the control machine and ensuring reliable SSH communication with the managed hosts. Follow the steps below to install Ansible on Ubuntu 22.04:
Step 1: Configure Ansible Control Node
On your Ansible control machine, open a terminal and run a command like `sudo apt update` to confirm you have sudo privileges. If the command executes without errors, you have the necessary permissions. To verify your Ubuntu version, use:
$ lsb_release -a

The Ansible control node centrally manages automation tasks on host servers. To configure it:
Create a dedicated user for Ansible management using the ‘adduser’ command:
$ sudo adduser [username]
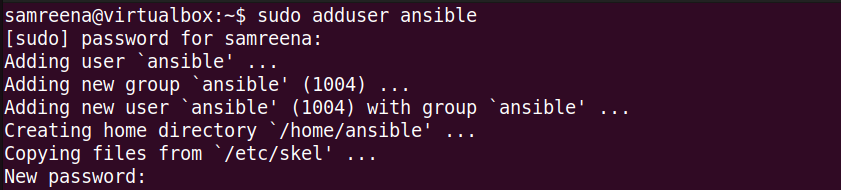
Set a strong password when prompted. You can optionally provide additional user information or skip these questions by pressing Enter. Grant the newly created user sudo privileges:
$ sudo usermod -aG sudo [username]
This allows the user to execute administrative commands using `sudo`.
Step 2: Generate SSH Key Pair
Generate an SSH key pair for passwordless authentication. On the control node, run:
$ ssh-keygen
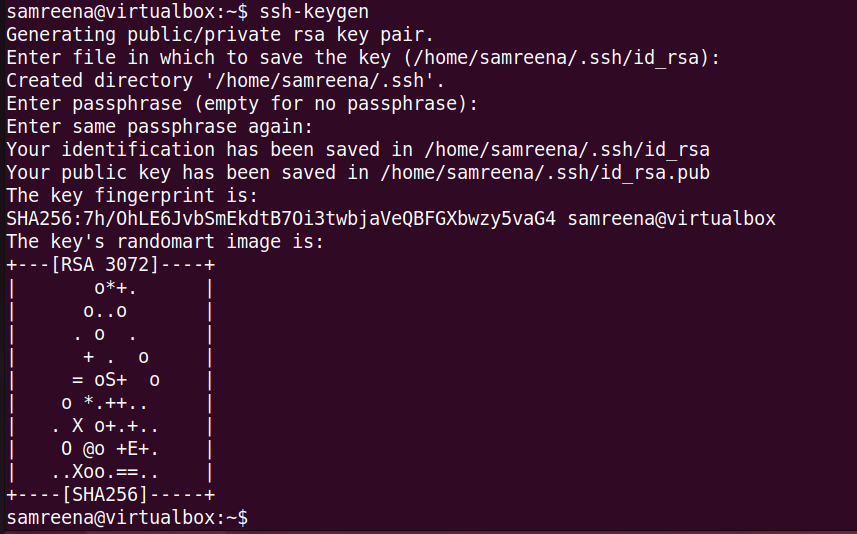
You can optionally set a passphrase for enhanced security. Pressing Enter bypasses passphrase creation.
The system will generate a public and private key pair.
Step 3: Set up SSH on the Ansible Host Machine
For each Ansible host (remote server), follow these steps:
Use the `ssh-copy-id` command on the control node to copy the public key to the host:
$ ssh-copy-id [username]@[remote-host]
Replace `[username]` with an existing administrative user on the host and `[remote-host]` with the host’s domain name or IP address. For example:
$ ssh-copy-id ansible@host-ip
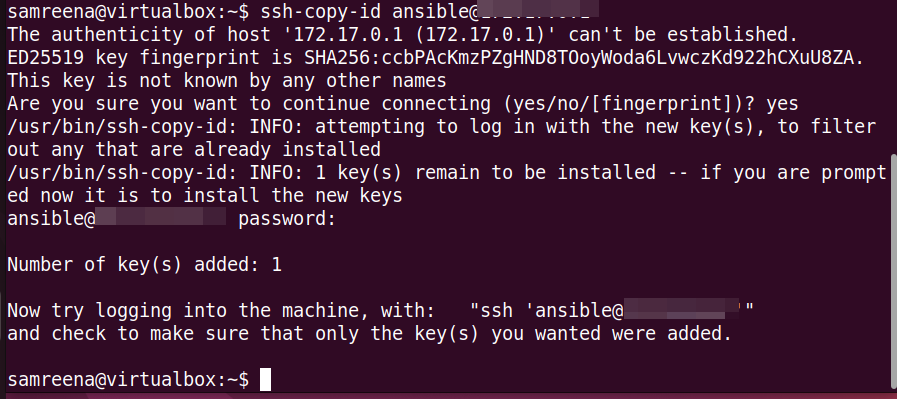
Type `yes` to confirm host authenticity and enter the password for the host account. This copies the public key to the remote host, enabling passwordless SSH.
Step 4: Install Ansible on Ubuntu
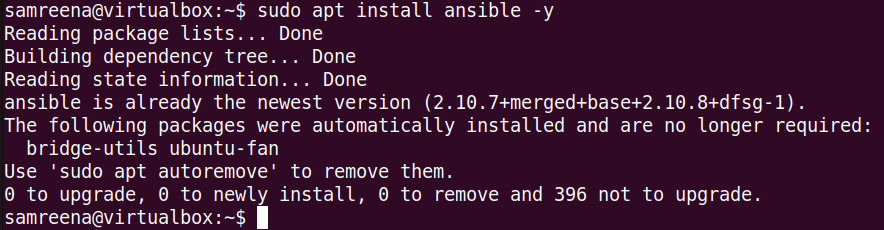
Now, install Ansible on the control node using APT:
Update the package index:
$ sudo apt update
Install Ansible:
$ sudo apt install ansible -y
Step 5: Verify the Installation
Confirm Ansible is installed correctly by running:
$ ansible --version

This will display the Ansible version, configuration file location, and other relevant information.
Step 6: Setup Ansible Inventory File
The Ansible inventory file contains information about the hosts Ansible manages. It’s created automatically on installation.
You can organize hosts into groups based on their roles (e.g., web servers, database servers) or operating systems, which makes managing them more efficient.
Hosts are listed by their hostname or IP address.
Edit the inventory file using either of the following commands:
$ vi /etc/ansible/hosts
or
$ sudo nano /etc/ansible/hosts
You can also create a custom inventory file in any location. When running playbooks or commands, use the `-i` parameter to specify the custom file.
Add the private IP addresses of your host machines under the `[servers]` group in the inventory file:
[servers]
Server IP-address
[server-ip or hostname]
Save the changes and exit the editor.
List the inventory items with:
$ ansible-inventory -i ansible/anventory --list
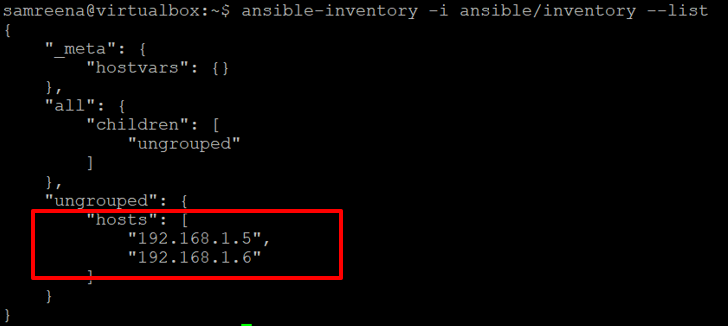
This will print a list of the hosts in your inventory.
Step 7: Test Host Machine Connection
Verify connectivity to the host machines with:
ansible all -m ping -u root
A successful connection will return a “SUCCESS” message. You may be prompted for authorization initially. Now, your control node is ready to manage your host machines.
Conclusion
This tutorial explained how to install Ansible on Ubuntu 22.04. We covered configuring the control machine, setting up the host machine, and establishing SSH key-based access for the Ansible control node.
Ansible offers numerous pre-built playbooks, modules, and plugins. Consult the official Ansible website for comprehensive documentation. Streamline your infrastructure deployment and server configuration using the BlueVPS Ansible module for a simplified learning experience.
Blog